• Welcome to Jetboaters.net!

    We are delighted you have found your way to the best Jet Boaters Forum on the internet! Please consider Signing Up so that you can enjoy all the features and offers on the forum. We have members with boats from all the major manufacturers including Yamaha, Seadoo, Scarab and Chaparral. We don't email you SPAM, and the site is totally non-commercial. So what's to lose? IT IS FREE!

    Membership allows you to ask questions (no matter how mundane), meet up with other jet boaters, see full images (not just thumbnails), browse the member map and qualifies you for members only discounts offered by vendors who run specials for our members only! (It also gets rid of this banner!)

    free hit counter

So... which one?

Big_D

Jet Boat Addict
Messages
58
Reaction score
30
Points
97
Location
Newnan, GA
Boat Make
Yamaha
Year
2008
Boat Model
X
Boat Length
21
Just to clarify, either will work... just mainly trying to decide on color and whether or not I need UV resistance.


I've found a source for replacement flush valves (same ones used by a popular e-tailer), just not sure which ones to go with. Here's the ones that come in the kit sold elsewhere, I was surprised to see they're not UV rated.


e75d9fa0d0ae7be8f49aa1634eacc0c4_zps9f81dfec.jpg


Here's the other option. They're UV rated and have a broader working temp range... but they're more $$. Not sure if that's the reason they weren't used in the kit or if it's mainly the color. I was thinking these would actually match the interior a little better though.
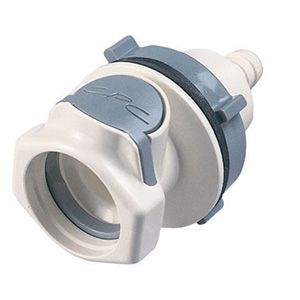


c67a8dd569d072011ca9624f987e74d1_zpsbd70b67d.jpg


Once I decide which route I'm going to go, I'll get them ordered and do a "how to" thread on the install... my stock ones leak like mad and drive me crazy! :mad:


D
 
Last edited:
Nice find @Big_D. What's your source?. Mine are under the port and starboard hatches so they rarely see the light of day so I could save the extra $$ on UV rated. Not sure if your 08 is configured the same way.
 
I'd have to double check but those look the same as the ones that came with my Island Racing Flush kit. Nice find. The kit I used stopped all the annoying leaks during flushing.
 
I'd have to double check but those look the same as the ones that came with my Island Racing Flush kit. Nice find. The kit I used stopped all the annoying leaks during flushing.

Didn't know that kit stopped the leaks. One more to-do mod to add to the pile!
 
I'd like the source as well. I've got one that pisses all over the place when I flush. VERY annoying.
 
Nice find @Big_D. What's your source?. Mine are under the port and starboard hatches so they rarely see the light of day so I could save the extra $$ on UV rated. Not sure if your 08 is configured the same way.


Thanks Gym... The cheapest I've found is in fact the link that cwpav8r found. The valves on the 212's are mounted next to the rear speakers and are always exposed.


I'd have to double check but those look the same as the ones that came with my Island Racing Flush kit. Nice find. The kit I used stopped all the annoying leaks during flushing.


They are indeed the same Dennis, that's actually the e-tailer I was a referring to. It'll save a little money going this route, but it's still not exactly a cheap mod. It will be worth it though.


David
 
I'd like the source as well. I've got one that pisses all over the place when I flush. VERY annoying.


See Ed's post for the link... from what I see though, we need the 3/8" barbed adapters. I'll post links to the correct ones if I can get this under way.


For the extra $4 I think I would go for the UV rated couplers...

@Big_D is this where you found them?

http://www.freshwatersystems.com/p-...mount-hose-barb-coupling-body-12-id-barb.aspx


Ed, that is the best source I've found as far as price goes. The minimum order per piece is 2. Not an issue, but we really only need one of the male connectors for the garden hose adapter side unless we make a "Y" adapter to connect to both sides at once.


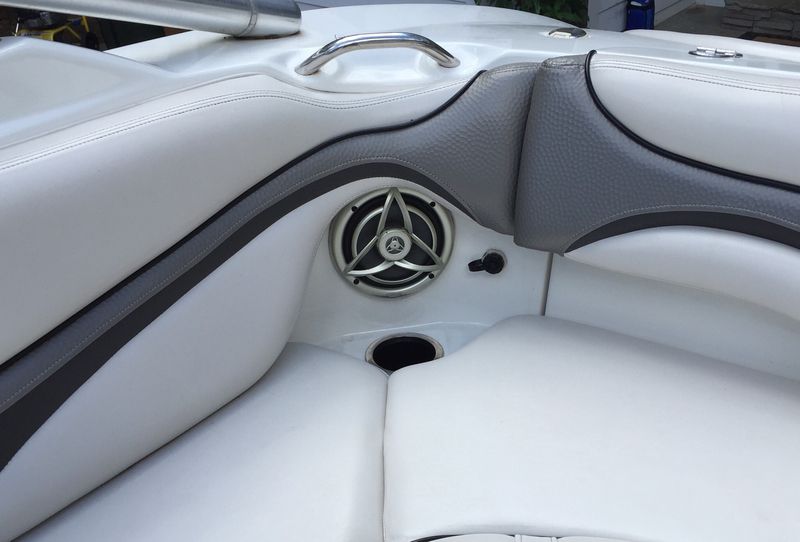
After being out on the boat today, I noticed the upholstery near the valves is actually the grey and charcoal area so the non UV version may blend in better. I'd really rather go with the UV rated one, especially since the difference is so minimal... don't want them to look out of place though.


David
 
They are indeed the same Dennis, that's actually the e-tailer I was a referring to. It'll save a little money going this route, but it's still not exactly a cheap mod. It will be worth it though.


David

Just to let you know, I did have to open up the hole in the boat a bit to fit the new flush kit in. It wasn't a big deal, but it wasn't just a 5 minute swap out.

I have pics somewhere if you want to see what I mean.
 
Just to let you know, I did have to open up the hole in the boat a bit to fit the new flush kit in. It wasn't a big deal, but it wasn't just a 5 minute swap out.

I have pics somewhere if you want to see what I mean.


Sounds good, definitely post them up if you have them. I had read that the holes needed to be enlarged with a dremel or something similar. I'm all about modding so that's right up my alley. :cool:


D
 
I used a die grinder with a sanding disc. Here's the pics

IMG_3150.jpg

IMG_3152.jpg

IMG_3153.jpg

IMG_3154.jpg
 
Looks great Dennis... thanks for the pics. I had actually planned on going with a 90 grinder and a rotary file and then cleaning the hole up with a tootsie roll (that's what we call the sanding disc you used in the aircraft industry).

Just curious, have you noticed if the adapter on your flush hose is valved or not? The easiest way to tell would be that water wouldn't flow out of it even if the garden hose was turned on. It wouldn't flow until you plugged it into the valve in the hull. They sell both valved and non-valved, just wasn't sure what Island Racing chose to go with. I kinda like the idea of having it valved so there's less mess in the boat.

As for the adapters in the hull, they definitely need to be valved. If they weren't, they'd leak with the engines running while on the water.


David
 
@Big_D my flush hose connector end is NOT valved. I use an inline hose shut off at the end of the garden hose.
 
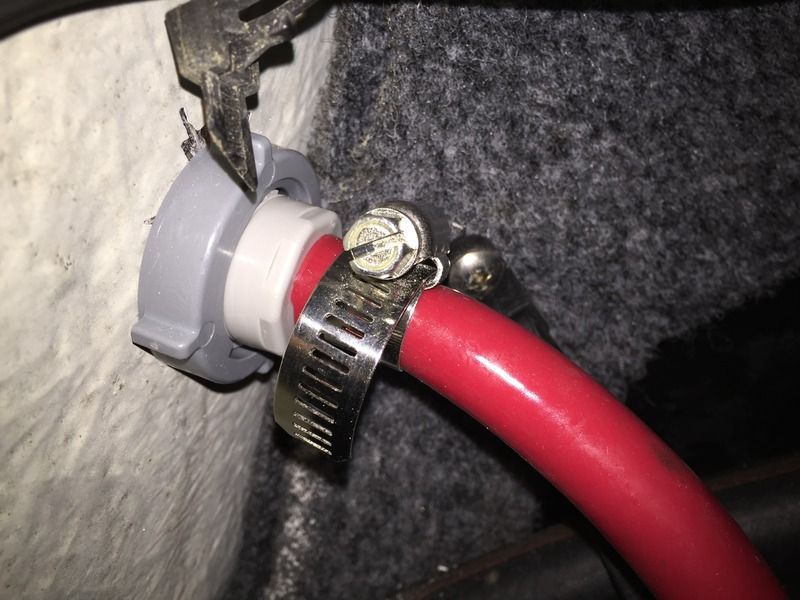
Finally got this mod done... soooo glad I did. The leaking stock valves were driving me crazy. I'll post some detailed install pics soon, but here's a before and after tease. :D


BEFORE

fdbd432ab416effe5123522bd20a6e0d_zpsk7wg0lma.jpg


AFTER


6be68bc5b8a97c0319a46e61a0699c21_zpsgb9le6zi.jpg


D
 
Finally an update on this...


Also, I've got a set of extra valves I'm going to list in the for sale forum, hope this helps some folks out.


NOTE: THIS IS 212X SPECIFIC, OTHER MODELS MAY VARY.


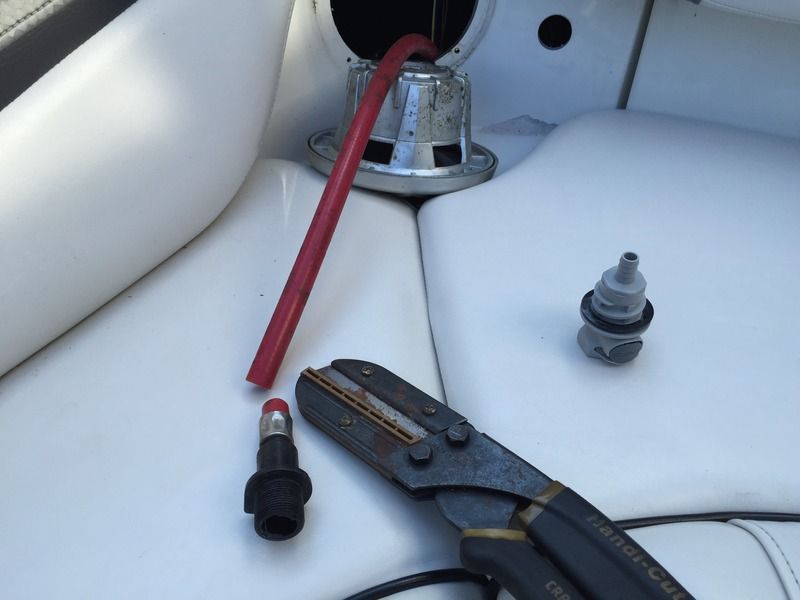
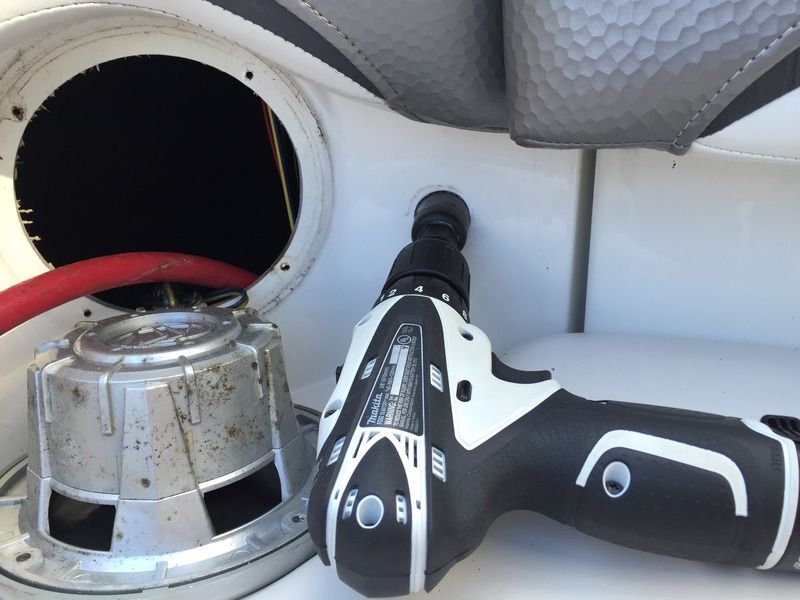
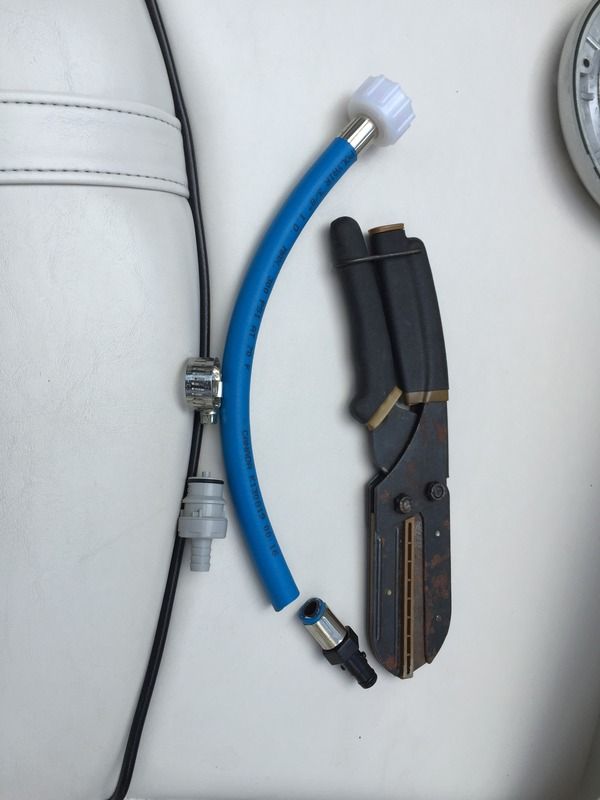
Here's the tools I used.

Drill
Phillips bit for drill
1-1/4" hole saw
Flat blade screwdriver
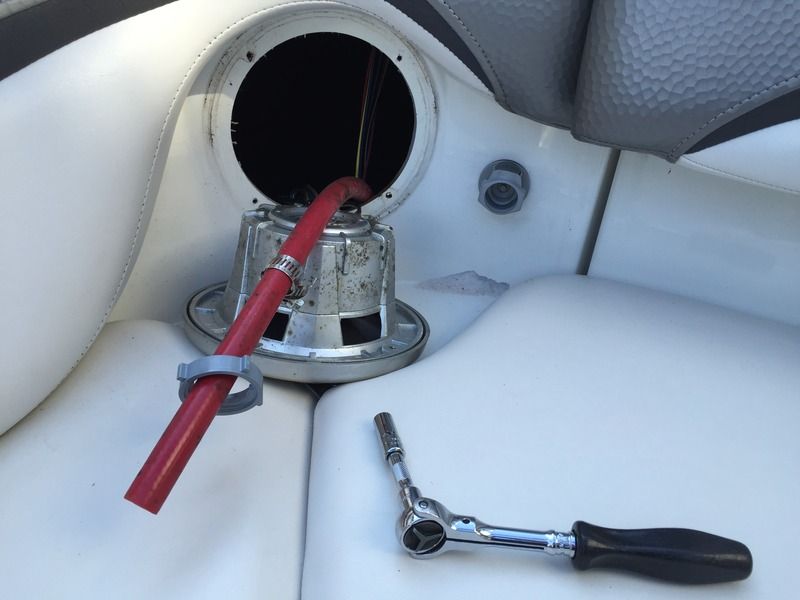
Rachet with 5/16" socket (to tighten hose clamps)
Tubing cutter (Craftsman cutters or similar work great for this)


3E6E224E-FA11-46CB-B468-581958330793_zpsjrnehvuy.jpg


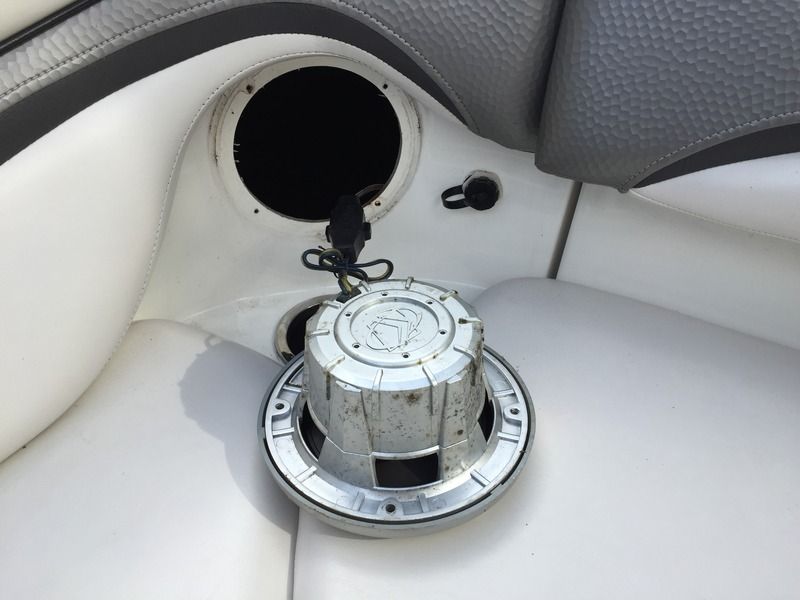
Remove the speaker (4 Phillips screws)


3B84152B-F957-49A8-962F-2CA691342BAF_zps36jfetz9.jpg


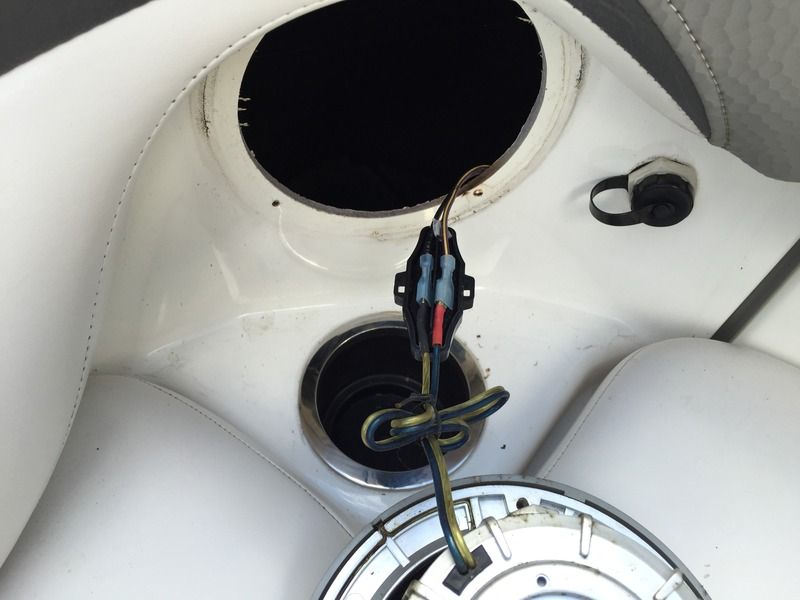
Disconnect the speaker wires, use the flat blade to open the sealed enclosure.


29F92BF2-7284-4EB0-80EA-463B367CD81E_zpskjbku2r5.jpg


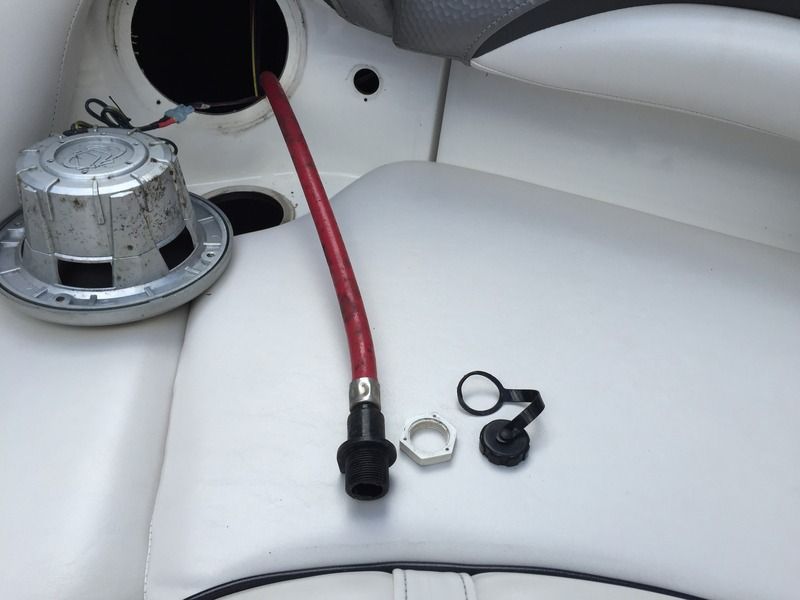
Remove factory flush port and pull the hose out through the speaker opening to make it easier to swap the valves.


4EB36864-C575-4429-B6AF-C2FC3098B474_zpspobapjgr.jpg


Cut the old valve off saving as much hose as possible


CD243B33-69B6-4D93-8EAD-5650C0762253_zpsbj1lnurp.jpg


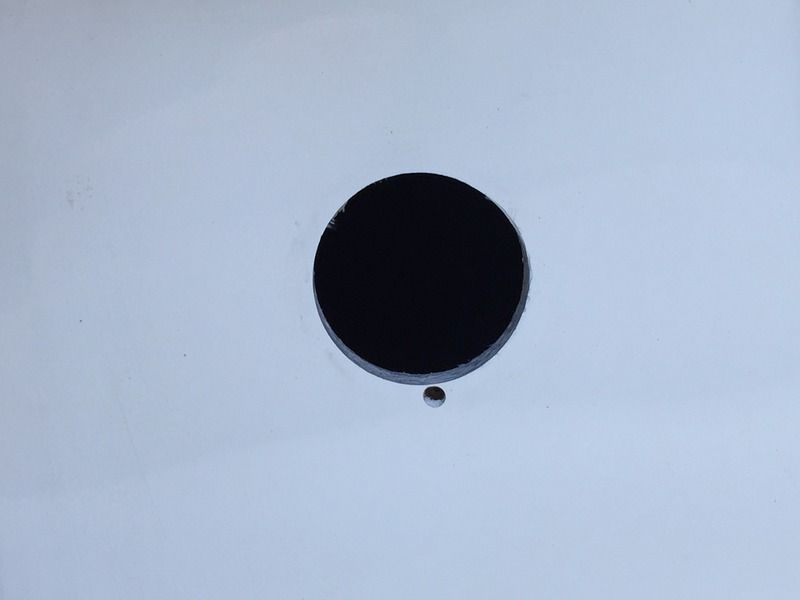
Using the hole saw, enlarge the existing hole (a hole saw makes a cleaner cut, but if you don't have one a drimmel and sanding roll will work too)


A74C5BD7-20A1-4678-8495-DDD1BBFF65E9_zpsskxkafhk.jpg


4D50D49A-FB0F-419A-A0E4-38047DBDFD80_zpsw2fnrkn0.jpg


Slide the hose clamp and the panel nut onto the hose. Be careful, don't let them slide down the hose behind the panel where it would be difficult to pull them back up. (I inserted the valve to test the fit, it was pulled back out right after this photo)


E47F650D-E91C-4CF7-960D-EEFFB13A9BB4_zpsig4fdv0j.jpg


Put the hose through the enlarged hole from the back and then push the new valve into the hose. Again, make sure the hose clamp and panel nut don't slide down the hose on you while you're working. (Sorry, I must have deleted this pic off my phone)

Now, put the valve through the new hole, tighten it down with the panel nut and then secure the hose with the hose clamp.


F5153F1F-18EA-4B72-AC40-9F721599810B_zpspxyzqwqv.jpg


D
 
Last edited:
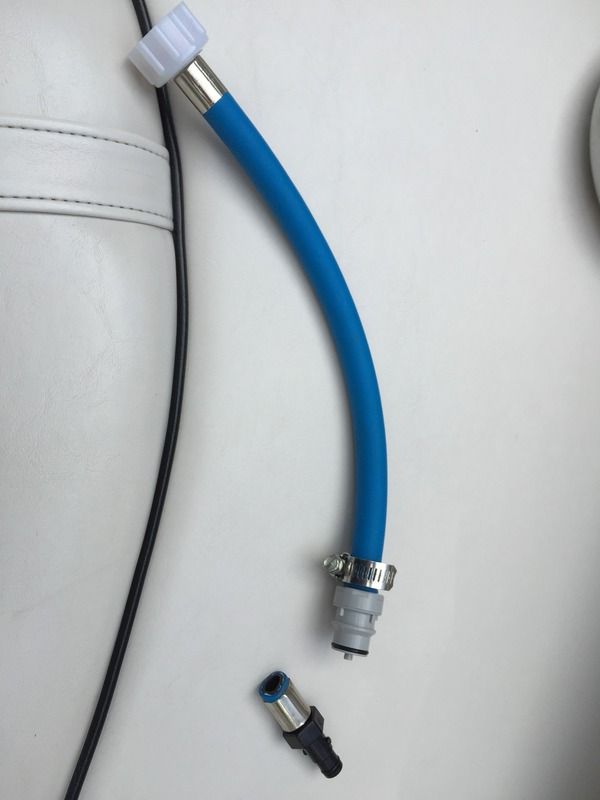
Next, you need to modify your hose adapter with the new mating valve.

Pretty straight forward. Cut the old valve off, slide the hose clamp on, insert the new valve into the hose and then secure the hose with the clamp.


B87C0AF5-8C21-4C48-BA99-028C9E279BE8_zpsp99g7pte.jpg


843D6221-4747-40E0-838B-DDE4DFE38497_zpstzi5noix.jpg


BD9DC824-14AA-43E8-AB5E-5DBAFD9651A2_zpsqrtm3cud.jpg


Note: care should be taken when using the modded adapter due to the excess end of the hose clamp sticking out. It can be cut off if desired.


Leak check good!


8C708E4C-594D-4446-B115-6F287CD8D48A_zpsia6zopxu.jpg


D
 
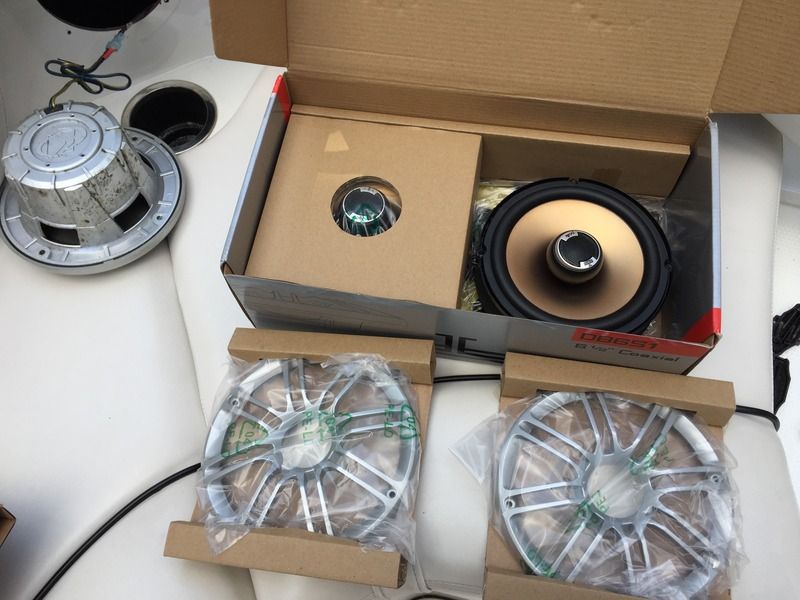
Now, I did take it a step further and install new speakers too, but that's not a necessity... :cool:


80289ACA-F33B-481E-B54C-6AEE3184CF0F_zpsnqyzvgrk.jpg


6be68bc5b8a97c0319a46e61a0699c21_zpsgb9le6zi.jpg


D
 
I may do this as this is the first I saw or heard of this mod, I hate the leaking factory connector also.
 
One of the best mods I've done to date... :cool:


D
 
One of the best mods I've done to date... :cool:


D


Yup. I don't dread flushing now. The leaks had gotten so bad that I had fished the hoses out and I was dangling them over the side of the boat during flushing operations. Highly recommend this.
 
Back
Top