• Welcome to Jetboaters.net!

    We are delighted you have found your way to the best Jet Boaters Forum on the internet! Please consider Signing Up so that you can enjoy all the features and offers on the forum. We have members with boats from all the major manufacturers including Yamaha, Seadoo, Scarab and Chaparral. We don't email you SPAM, and the site is totally non-commercial. So what's to lose? IT IS FREE!

    Membership allows you to ask questions (no matter how mundane), meet up with other jet boaters, see full images (not just thumbnails), browse the member map and qualifies you for members only discounts offered by vendors who run specials for our members only! (It also gets rid of this banner!)

    free hit counter

3D Printed Switch Panel

svana

Jetboaters Lieutenant
Messages
426
Reaction score
388
Points
157
Location
Riverview, FL
Boat Make
Yamaha
Year
2008
Boat Model
SX
Boat Length
23
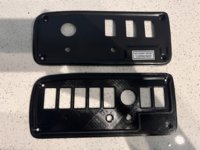
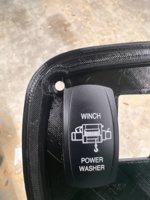
I've always felt that the switch panel to the right of my SX230 is grossly underused and poorly designed so you can't get more than maybe one or two additional switches in. With a freshwater shower being on the "to-do" list, this was a prerequisite in order to have an appropriate place to put the switch. The new plate holds 4 additional switches and I'll use this time to replace the cigarette lighter with this much more useful socket. I printed it with PETG, the plan is to spray it with some high fill primer to lose the layer lines and cover with a metallic black as I think that's the closest match to the original plate. I'll finish it up with a couple coats of UV resistant clear coat to further protect it from the sun and elements. I'm actually surprised as to how well it printed as my printers been giving me fits. The additional 4 switches will likely cover most if not all of my future needs (I'm looking at you, fridge and inflator lol) and worst case I'll reprint a panel for my radio which is slated to be replaced anyways. I had a few leftover Contura V switches from my 4Runner which I tested them with as I'll be replacing all of my old SX230 switches with the same style as well.

IMG_2185.jpg

IMG_2186.jpg

69505180972__B9BE5B6E-CAC9-4593-9B39-CB6E398DE0CA.jpg

IMG_2189.jpg
 
Very cool. What kind of 3D printer did you use?
Built my own - based off the BLV MGN Cube. I wanted something that gave me a large print area (I've got 400mm^3, or 16"x16"x16") and the DIY route was the most effective way to achieve that.
 
Impressive. Good for you.
Thanks! It would admittedly be much less buggy if I went the commercial route. Some of the printers that are out there nowadays are really great right out of the box with minimal tweaking. Not sure I'd go the same route if I was starting today.
 
Great stuff... im seriously considering a 3d printer as a retirement present... we used a old tape robot and built a cnc 4'x4' plasma cutter with a 6" Z axis... Steppers and DC power with Gecko controllers... we have unigraphics and my buddy wrote a post processor for the M&G code... we did a 2 axis cnc mill R-8 chuck as well... we specifically picked on with a fairly large Y travel...
 
Really digging that. Interested to see how it turns out.
 
Great stuff... im seriously considering a 3d printer as a retirement present... we used a old tape robot and built a cnc 4'x4' plasma cutter with a 6" Z axis... Steppers and DC power with Gecko controllers... we have unigraphics and my buddy wrote a post processor for the M&G code... we did a 2 axis cnc mill R-8 chuck as well... we specifically picked on with a fairly large Y travel...
If you've got CNC experience, a 3d printer is really just an easy lateral step - just additive manufacturing instead of subtractive. I've wanted a CNC big time but I just don't have the real estate for one that's a decent size. Nowadays for woodworking there are units like the Shaper Origin and the Goliath CNC that I'd consider, but they're definitely pricey and limited to wood and AL.
 
Great stuff... im seriously considering a 3d printer as a retirement present... we used a old tape robot and built a cnc 4'x4' plasma cutter with a 6" Z axis... Steppers and DC power with Gecko controllers... we have unigraphics and my buddy wrote a post processor for the M&G code... we did a 2 axis cnc mill R-8 chuck as well... we specifically picked on with a fairly large Y travel...
If you can do that......Modern 3D printers (even hobbyist level ones......are going to be absurdly simple.

I've had my eyes on the SnapMakers for awhile. Laser engraving, cutting, and light CNC work from the same machine. Downside is they're somewhat expensive, fairly closed source, and loud as dammit. Really cool concept though. Also, I mean honestly, I have enough hobbys/tasks/things as it is. I don't need more :D
 
How did this turn out? Did you consider printing it in ASA and then vapor smoothing it with acetone?

I'd like to hear about your process in measuring and designing this to be so close to the OEM trim. I attempted to do this last year with a surface mount chartplotter but I could never get the dimensions correct. I tried measuring by hand and then the picture/tracing route in Fusion 360 but my iPhone camera lens seemed to be skewing it so I eventually gave up and cut it out of plastic board with a router.
Turned out good enough for me. Unfortunately I scratched it a bit when it was sitting out, but I’m not going to bother reprinting. I went with petg because it’s got a higher heat tolerance than ABS and the paint/primer would be smooth enough, especially after a couple UV resistant clear coats. My only gripe is I laid the high fill primer a little thick which is why it’s soft enough to get scratched.

I didn’t do anything extraordinary as it pertains to modeling, I (humbly) believe I'm pretty good at measuring and modeling so I just took a set of calipers and mocked it up with an overlay of as perpendicular of a photo as possible in F360.
IMG_2834.jpeg
 
@svana, you did an excellent job.

If it were me, I would have modeled it so that the majority of the surface was flush with insets for the screws and possibly the switches then printed it face down on a textured PEI sheet to give the face a consistent textured appearance then I would have installed it without painting. But alas I installed a secondary switch panel behind the throttles so I have no excuse to start this project.
I had considered it, but I wanted as OEM of a look as possible so I tried to model the ridge as well as find a paint as close as possible. A flat surface would've definitely cut down on the processing time though.
 
Here’s a side by side comparison of the two the photo seems to show the layer lines a bit more than in person.IMG_2351.jpeg
 
Here’s a side by side comparison of the two the photo seems to show the layer lines a bit more than in person.

I think you did an incredible job of matching and improving upon the original.

My approach would have been a lazy version.
 
My understanding is that ABS can withstand something like 105* C versus PETG which is more like 85* C but it’s hard to know what is true and what the blends of each roll of filament actually are. I think it turned out great. Layer lines are always much more visible in pictures than in person I’ve noticed. Nice work, that’s better than I could do in the tracing a picture method. I just couldn’t get it the right dimensions to fit into the recessed part of the dash.

IMG_1907.jpeg
 
My understanding is that ABS can withstand something like 105* C versus PETG which is more like 85* C but it’s hard to know what is true and what the blends of each roll of filament actually are. I think it turned out great. Layer lines are always much more visible in pictures than in person I’ve noticed. Nice work, that’s better than I could do in the tracing a picture method. I just couldn’t get it the right dimensions to fit into the recessed part of the dash.

View attachment 200947
Never mind, you’re correct - just checked and my abs spools have a higher recommended print temp. Not sure why I didn’t go with ABS, PETG just happens to be 99% of my use nowadays. I think PETG’s got better UV resistance as well. If I recall when I was doing vapor baths they came out a little more flexible which I didn’t want, but I hadn’t dialed that in particularly well.
I hear you on the modeling. With a flat piece like that that is a little more complex maybe you can just put it on a paper scanner and just scale it to size?
I'm a big fan of PETG also and I have had stuff outside for two years in the sun without any issue so perhaps the UV/heat thing is overblown. I printed some gauge bezels for the boat and wound up using ASA just in case since it's supposed to be better at UV resistance, but this year I noticed that one is cracked. I'm not sure if it was my fault screwing it down too tight or if it cracked in the sun, probably the former. The interesting thing is I bet PETG wouldn't have cracked since it has some flex. It's not a big deal to replace them so I can always reprint.

I did try to scale it but just didn't have any luck. It was disappointing too because a whole printed dash would've been pretty slick with perfect edges.
I usually take a couple iterations tweaking the print, very rarely is it a one and done lol. This guy took me 2 passes I believe.
 
Back
Top