• Welcome to Jetboaters.net!

    We are delighted you have found your way to the best Jet Boaters Forum on the internet! Please consider Signing Up so that you can enjoy all the features and offers on the forum. We have members with boats from all the major manufacturers including Yamaha, Seadoo, Scarab and Chaparral. We don't email you SPAM, and the site is totally non-commercial. So what's to lose? IT IS FREE!

    Membership allows you to ask questions (no matter how mundane), meet up with other jet boaters, see full images (not just thumbnails), browse the member map and qualifies you for members only discounts offered by vendors who run specials for our members only! (It also gets rid of this banner!)

    free hit counter

Cheap glove box hold open spring mod. Same.. but different

Big_D

Jet Boat Addict
Messages
58
Reaction score
30
Points
97
Location
Newnan, GA
Boat Make
Yamaha
Year
2008
Boat Model
X
Boat Length
21
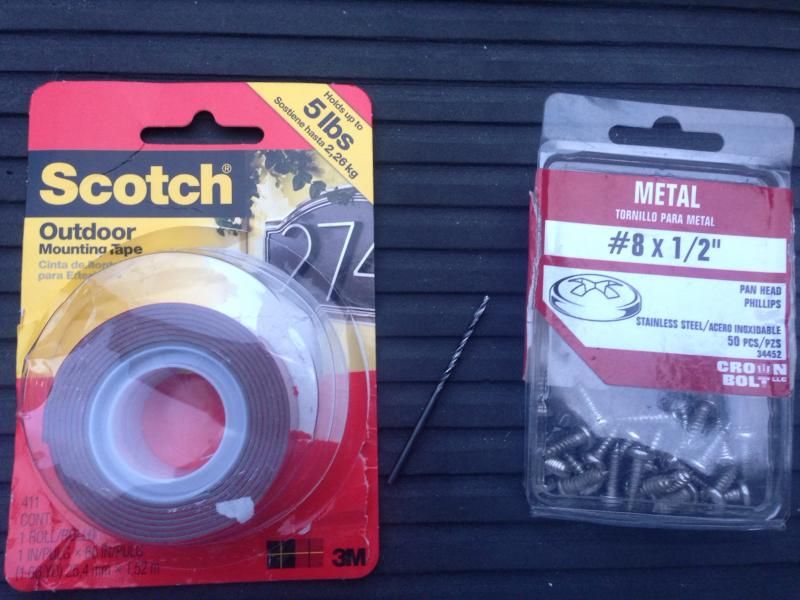
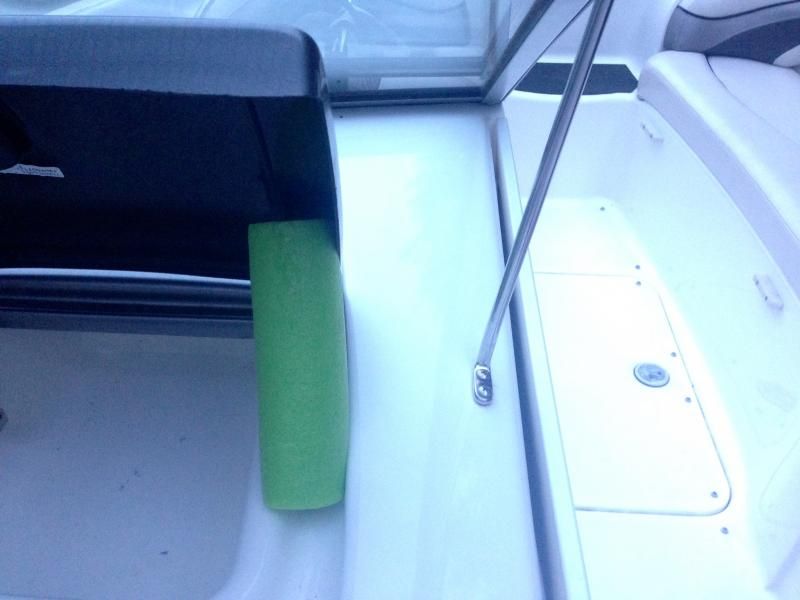
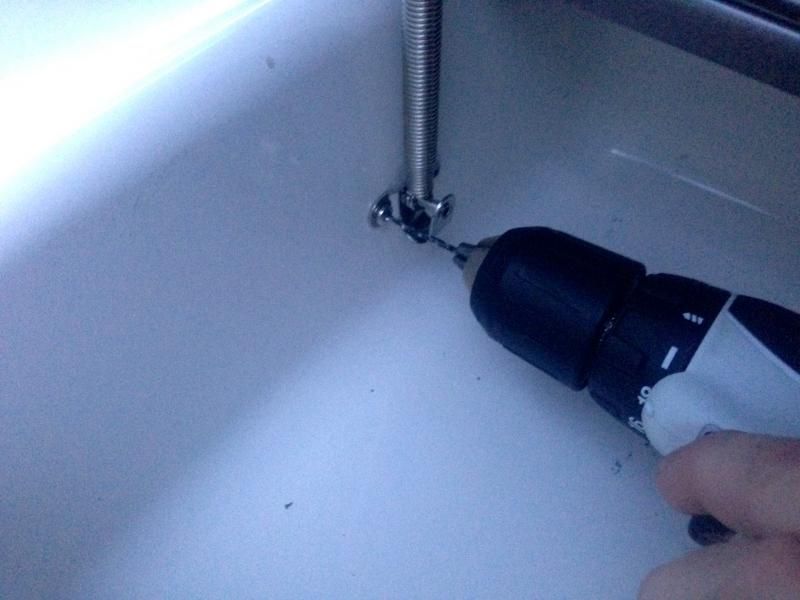
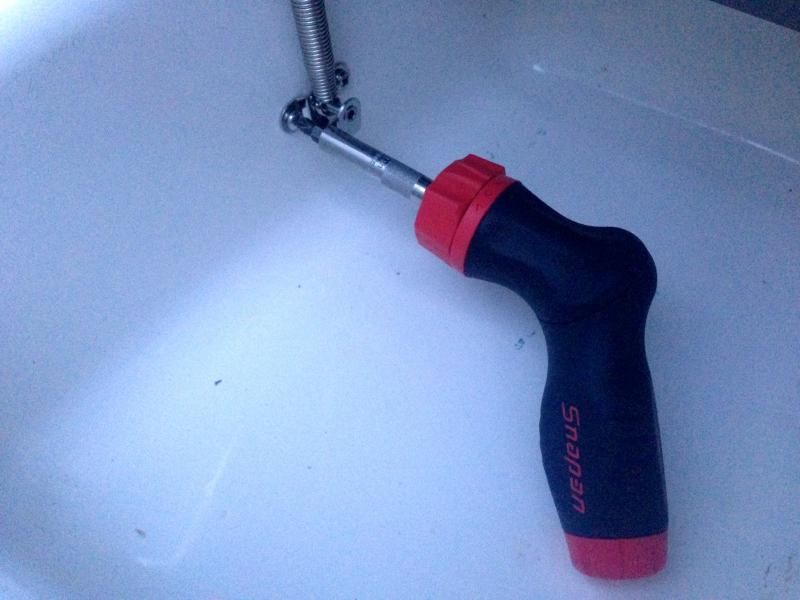
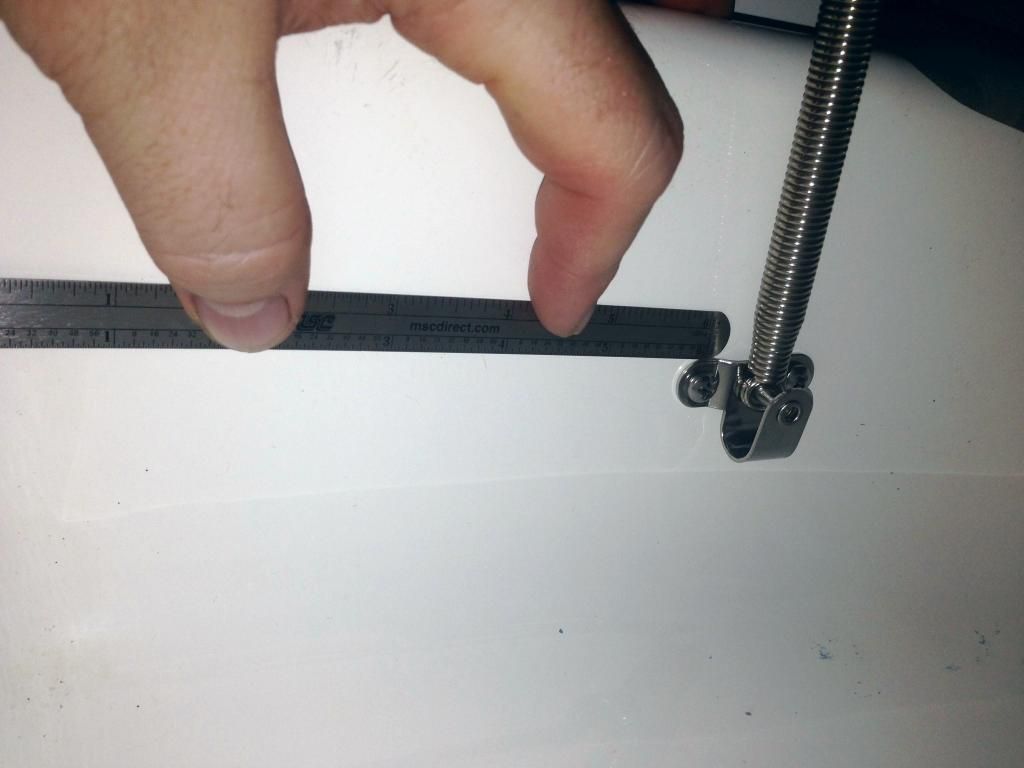
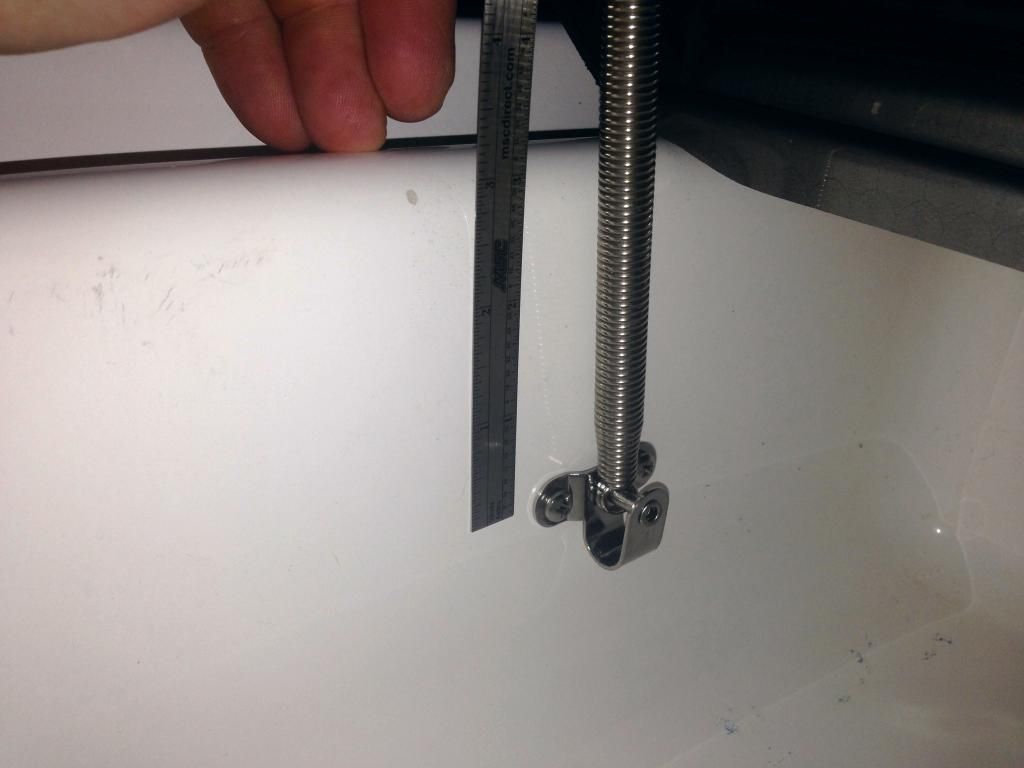
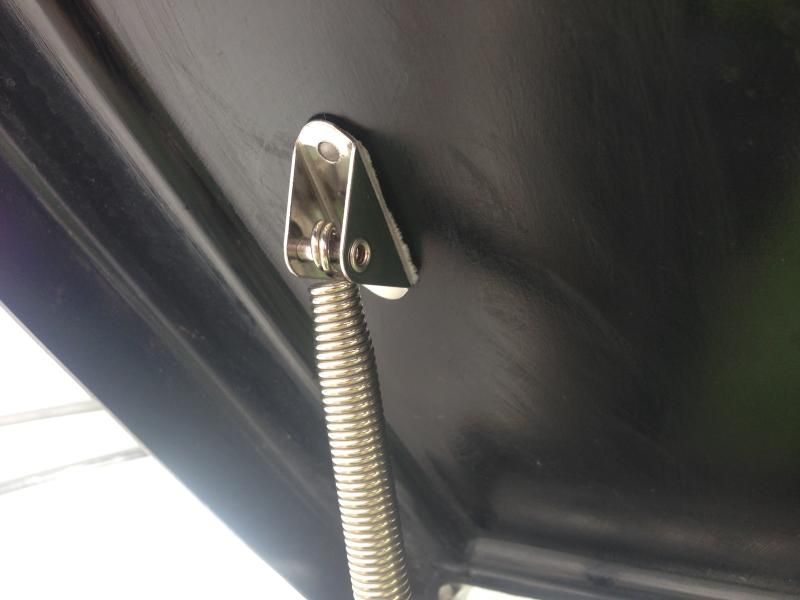
I've seen a few threads (mainly on the other board) for installing a spring to hold open the glove box, similar to the one that holds open the anchor hatch. I wanted to give it a shot as I was tired of the lid dragging on my arms as I was digging for something, but I didn't want to attach the spring to the lid in a way that couldn't be reversed if it didn't work out. From what I saw, some folks epoxied the upper part of the spring to the underside of the lid. This would work, but I wasn't too sure if I'd be able to get all of the epoxy off if I wanted to. Others have drilled the lid, not really what I was wanting to do either. After a little thought, it came to me... why not try some 3M double sided moulding tape. I knew I had some laying around, so I just needed a spring to give it a shot. A little surfing on the inner web and here's what I came up with:


Link <<--


I ordered it on a Wednesday, it arrived two days later on a Friday... not bad. I wish I had taken some pics as I was installing, but I really wasn't sure if it was going to work out or not. Plus, it was getting late and I still had to put the cover on. I will say though, this is probably about as easy as it gets when it comes to mods. It took me maybe 5 minutes, and that included pulling everything out of the glove box and cleaning it.


I've got some pics that I'll post later, but they're not that great due to the lighting and the fact that I took them after I had installed it. I will say that it works great though. I installed it a few weeks ago and the 3M tape doesn't appear to be having any issues holding up to the pressure of the spring in the closed position.


D
 
I can't wait to see them. I've been apprehensive about drilling holed in the lid too. So I'd love to see what you've done here. Thanks for posting.
 
Great solution. I tried epoxy but it kept coming loose after winter storage. I finally bolted mine. Good thinking, Big_D.
 
Sorry for the delay in posting some pics, we had baseball practice (I coach my sons team). Here's some pics, but like I mentioned earlier, they're not that great. If need be, I can pull the spring back off and put together a detailed "how to". Here's a shot of some of the materials used, hard to tell in the pic but the 3M tape is the grey thin foam type with red release tape on the outer surface.


IMG_0036_zps025e8dab.jpg


To start off, I sanded the upper side of the horizontal mount bracket (top mount bracket). This roughens/scuffs up the stainless which gives the 3M tape a better bond. Clean the newly sanded surface off with some acetone and a clean cloth. I then cut about an inch and a half piece of the 3M tape and firmly pressed the exposed side to the sanded area on the bracket (the red release tape should be facing out). I used a pair of scissors and cut around the edges of the bracket to remove the excess tape.


To make things a little easier, I propped the lid up with a piece of noodle I had laying around.


IMG_0038_zps2cbbac83.jpg


Next, I figured out what I thought would be the best place to mount the lower bracket. Once I had my location, I drilled one pilot hole and started one of the stainless screws into it. I tightened it until the bracket was snug but could still be slightly moved. Then I leveled the bracket out and drilled the remaining hole and threaded the remaining screw in.


IMG_0039_zpseb107660.jpg


IMG_0040_zps6af11f1f.jpg


Then, I cleaned a large area on the bottom side of the lid with acetone. I pulled the red release tape off the 3M tape to expose the adhesive, pushed the glove box lid all the way up until it touched the windshield and then stuck the upper bracket to the lid in a position where it was vertical in the full open position. This Is the finished product, the spring is pulled towards the aft side of the glove box to collapse it and close the lid.


IMG_0041_zps2e9d3b6d.jpg


Here's some shots to show approximate measurements. The furthest aft hole measures out right at 6" from the rear of the side of the glove box. I took this measurement from the point where the ruler sits flush on the sidewall, not in the curved radius.


IMG_0051_zps99525ca4.jpg


From the upper edge of the radius, the hole is right at 3 1/4".


IMG_0049_zpsd5ab8e38.jpg


Hope this helps...


D
 
Last edited:
Something I just realized that folks might want to keep in mind. I used a 9" spring on my install, I think the West Marine spring that others have used in the past is 10". This would most likely change the dynamics of things and the measurements I provided would be off for the longer spring.


D
 
Still holding strong... we're actually out on the water now.:D


1B949775-2011-4006-B633-9A567C2BDD82_zps28diufkq.jpg


D
 
Awesome. Thanks again for the detailed write up.
 
@Big_D thanks for the write up. I have previously purchased my spring and epoxy, just hadn't gotten around to getting epoxy everywhere. Now you give me a new solution. I'll be buying the 3M tape this weekend and completing this mod with it.

Quick question. I see you used screws for the bottom mount. Is that because the 3M tape won't hold there because of the stress?


Glad to help out... there's a few reasons I went with screws on the lower mount. Mainly, like you mentioned, I wasn't sure if the 3M tape would hold since it's under a different type of load (more of a shear load) than the upper mount. Also, I figured if I needed to remove the spring for some reason, the small holes could be filled pretty easily and wouldn't be too noticeable since they're inside the glovebox.


D

Makes sense. Okay thanks.
 
Awesome idea and write up....just what i was looking for
Thank You!
 
IMG_0215.JPGI was a little sloppy with the Gorilla Tape, but used silicone and stainless screws.
Thanks for the posting and idea!
 
Back
Top