Speedling
Jetboaters Admiral
- Messages
- 5,278
- Reaction score
- 4,543
- Points
- 442
- Location
- Cedar Lake, IN
- Boat Make
- Yamaha
- Year
- 2008
- Boat Model
- SS
- Boat Length
- 21
Did sucking the oil out with shop vac make a big mess of it?

We are delighted you have found your way to the best Jet Boaters Forum on the internet! Please consider Signing Up so that you can enjoy all the features and offers on the forum. We have members with boats from all the major manufacturers including Yamaha, Seadoo, Scarab and Chaparral. We don't email you SPAM, and the site is totally non-commercial. So what's to lose? IT IS FREE!
Membership allows you to ask questions (no matter how mundane), meet up with other jet boaters, see full images (not just thumbnails), browse the member map and qualifies you for members only discounts offered by vendors who run specials for our members only! (It also gets rid of this banner!)
(referencing a 2005 AR230HO)
what you need to do two engines:
- 10w40 (amount depends on how much you want to take out. the max you will need is 9 qts)
- 2 oil filters (i use Mobile 1 M1-110)
- 2 crush washers (no longer available from Yamaha - "M8 Plug Washer" ID: 8mm - OD: 15mm)
- vac pump (ex: Pela Extractor) or modified shop vac* and hoses
- engine flush adapter with water hose
- oil filter wrench
- funnel
- gallon milk jug
- 12mm socket with extension and wrench
- torque wrench (set to 13 ft-lbs) a smaller, in-lbs will get into the tighter port side
- paper towels
* took my shop vac, pulled the hose off, cut about 3 ft of old garden hose at the male end, put it into the vac adapter and used duct tape to seal it:
View attachment 13306
i recommend doing the starboard motor first since it leaves you more room to practice for the tighter port engine. attach the flush adpater, start the motor, turn the water on, and let it run for 6-8 mins. turn off the water and then turn off the engine.
OIL COOLER: the garden hose does a great job getting the large cooler area (about 2.5 qts). to get another quart, you'll need a smaller hose. i placed a straight coat hanger inside the hose to make aiming it easier then taped a gear oil tip to it. insert the hose down into the cooler and use a flashlight to guide it through the quarter-sized opening. then butt the gear oil tip to the end of the garden hose to get oil out of the pump area. once "emptied," i personally start the engine again for 8-10 seconds (i think you could also do this by cycling the motor with the lanyard pulled). this cycles more oil to where the smaller hose can get to it for removing 3.5 qts out of the top.
View attachment 13307
with the smaller hose, i was able to get to the screen. i managed to pick up a large piece of crud here in March 2017. my best guess it is red Loctite:
View attachment 53097
OIL FILTER: take the milk jug and cut the bottom off of it. make it so it is about .75" to 1" deep. place this under the filter. remove the filter and catch the oil in the jug bottom. on the port side, i wedged a towel under the case to stabilize the jug bottom. i used the small vac hose to pull any oil left in the filter area:
View attachment 13312
DRAIN: you can now go a step further to get the rest out of it by using the drain bolt. the bolt is #3 in the following diagram and it requires a 12mm socket. it is on the stern-side, at the bottom of the motor and has a brass crush washer. it is fairly obvious relative to the other possibilities and very easy to find with a mirror:
View attachment 13305
wedge the jug bottom underneath the drain bolt and place the vac hose so it can prevent overflow. now turn the bolt out with the socket and extension. it is torqued to only 13 ft-lbs, so it comes out very easily. note the plastic, black coupler shroud in the next pic - i realigned the powertrain early 2015 and never put them back on. i like the improved access:
View attachment 13308
View attachment 13309
View attachment 13310
IMPORTANT: make sure the old crush washer comes off. i've had it stick to the engine quite a few times and had to use my fingernail to get it to let go. other times it has been stuck to the drain bolt.
mirror showing the drain (updated with more recent pic. also note the shroud is gone):
View attachment 53085
there's not going to be much left unless you opted not to cycle the pump for 8-10 secs. but have the vac ready to prevent overflow. you'll want to vac the jug bottom out before you try to get it out of the engine bay. throughout this whole method, i maybe spilled a couple drops. the drain is going to flow and then drip for a while. once you're satisfied, clean the drain hole with a paper towel and install the drain bolt with a new crush washer. you will be able to use a torque wrench on the starboard side, but not the port (unless using a smaller in-lbs model). again, it's only 13 ft-lbs (note: the manual also has this listed as 14 ft-lbs, depending on the page), so need to crank on it if you don't have a torque wrench that fits.
REFILL: with the new filter installed, it's time to replace what you took out. i use an old Mobil 1 5-gallon jug with the quart markers to gauge what i removed. when in doubt, put in less. the engine will be fine being a little under full, but risks damage if overfilled. if you include the drain bolt step, you can get nearly all of it out. capacity is 4.5 qts, so my strategy is to replace about 4 qts and run it a few mins to warm it back up then see where i stand. i try for about 85% to the full mark - then i'll top it off on the next outing with the boat leveled in the water.
OIL LEVEL: obviously, you want to get the level somewhere between the lower and upper marks on the dipstick. the consensus on the forum seems to be to aim closer for the lower mark on the dipstick if the engine is cold -OR- aim for the upper mark if the engine is warmed to operating temperatures.
Great write up. I also had water in my oil and had to use your information that you provided, thanks.
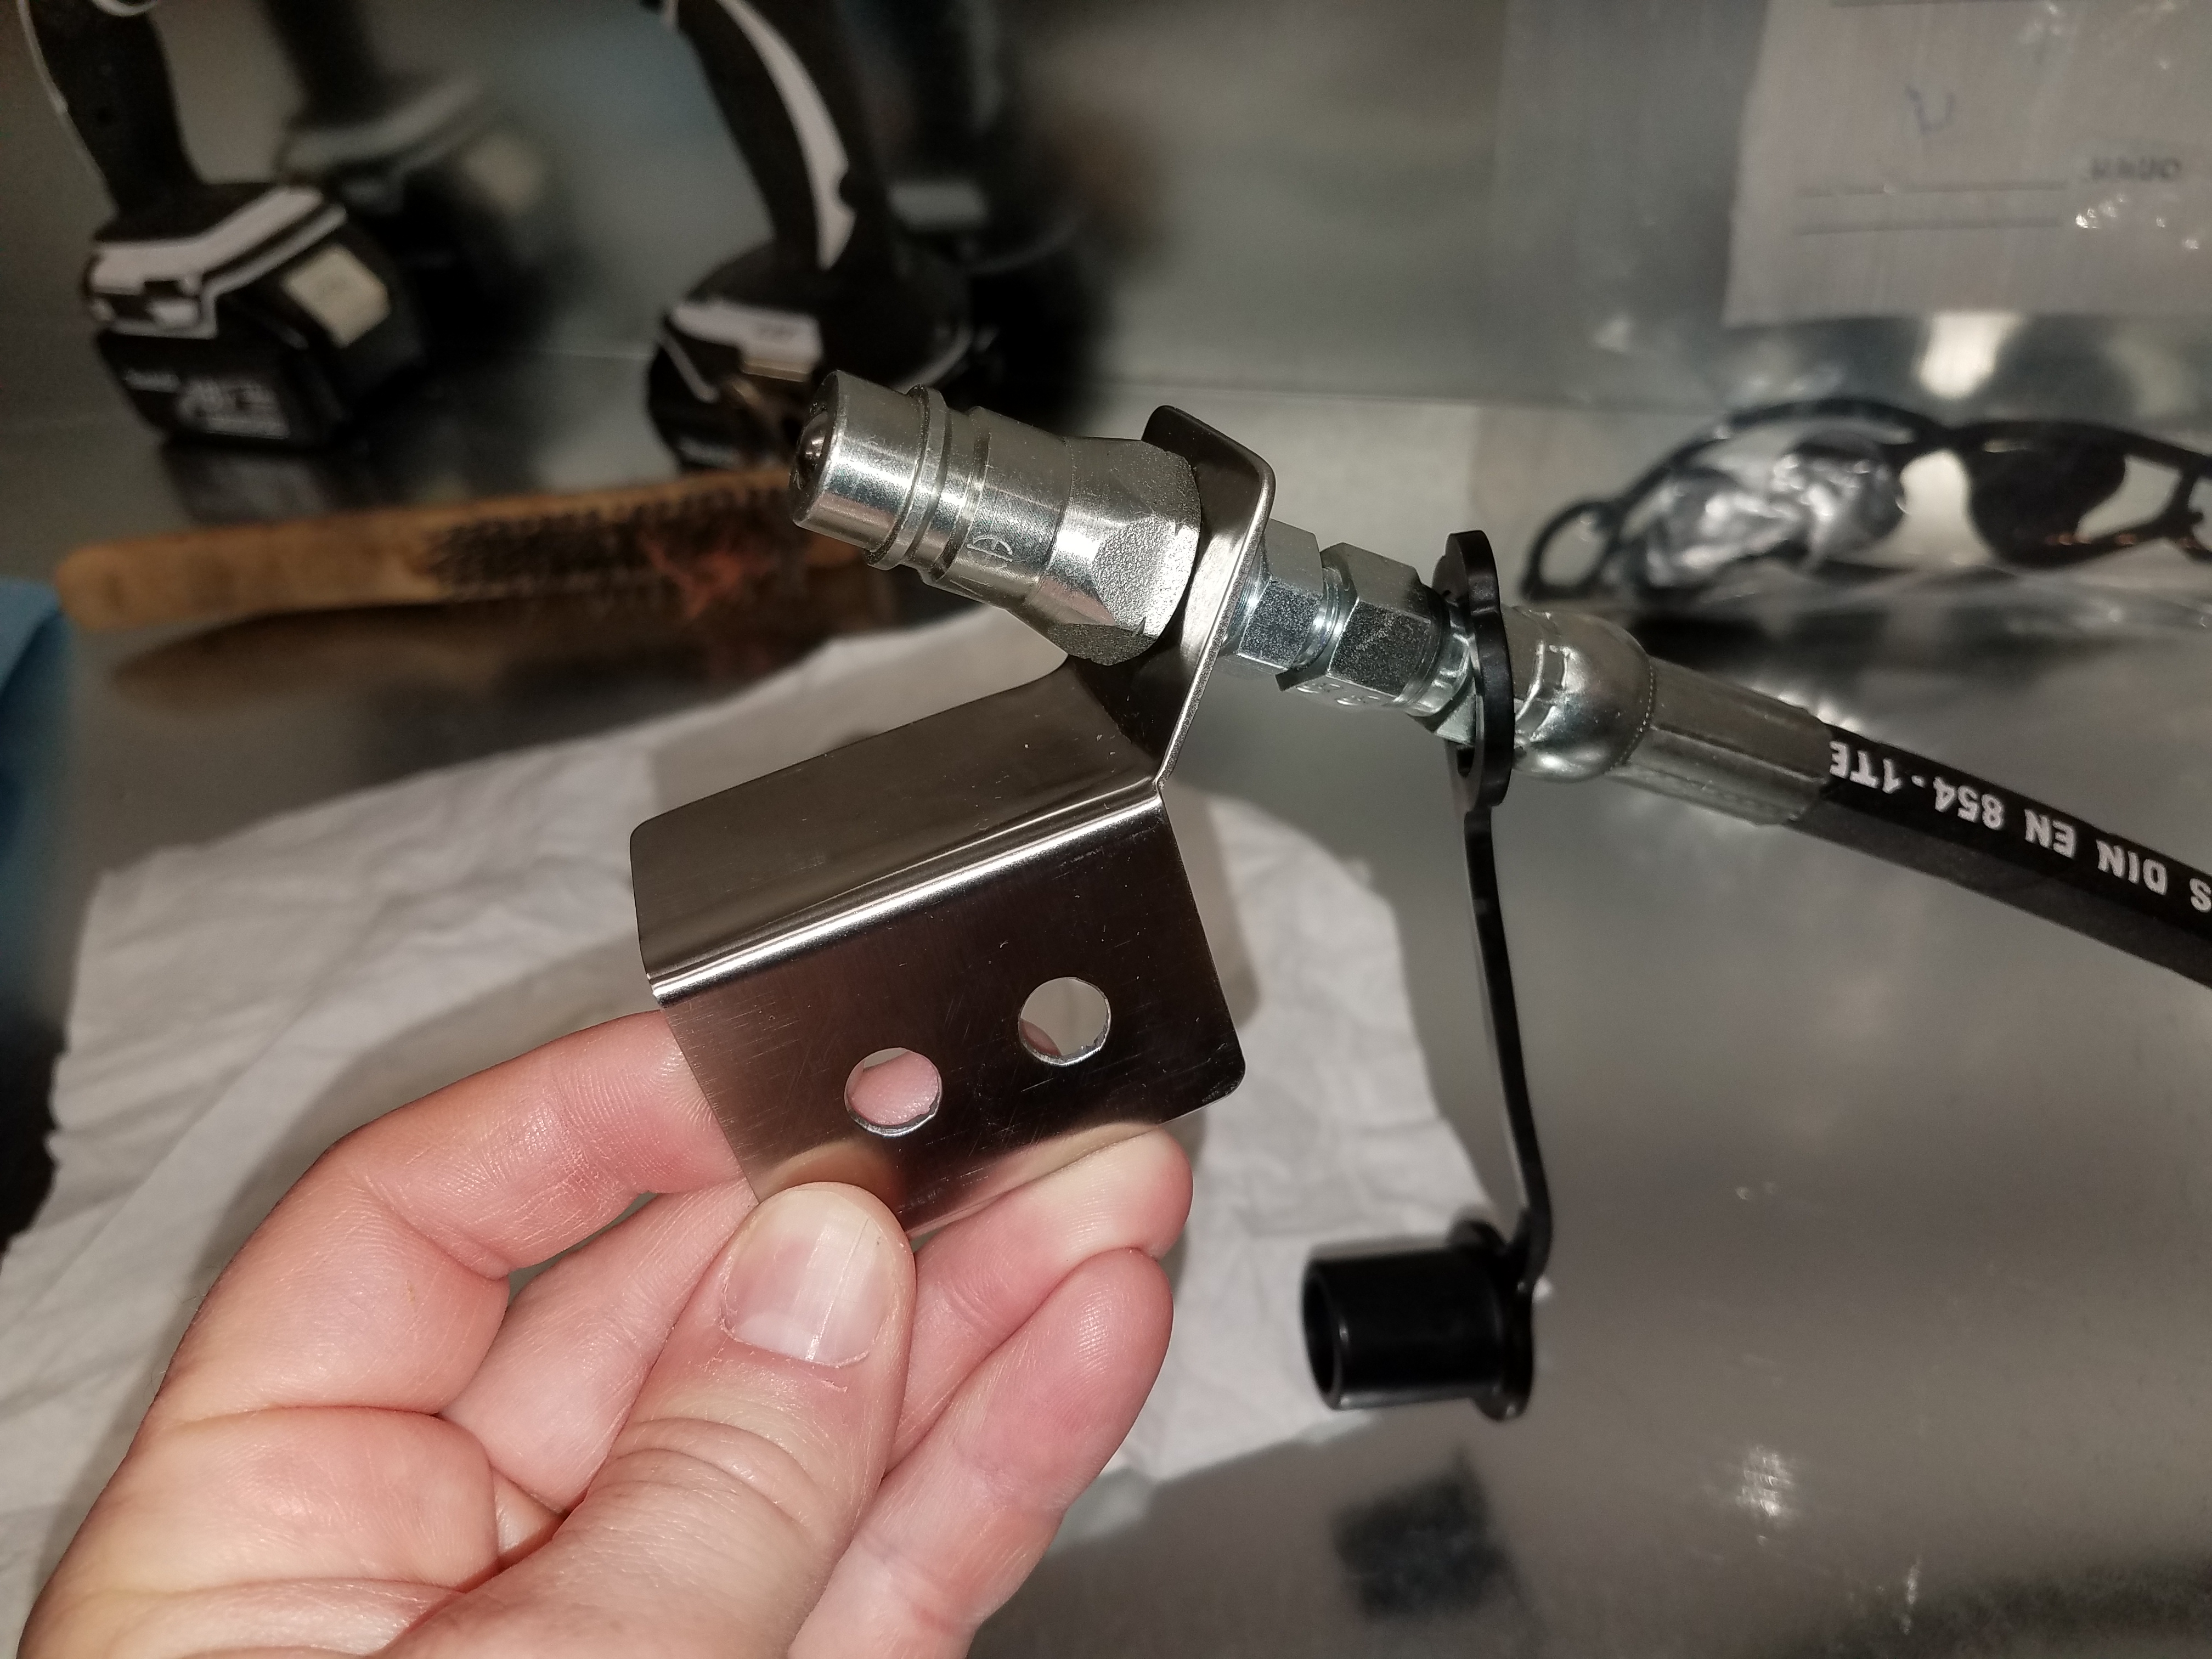
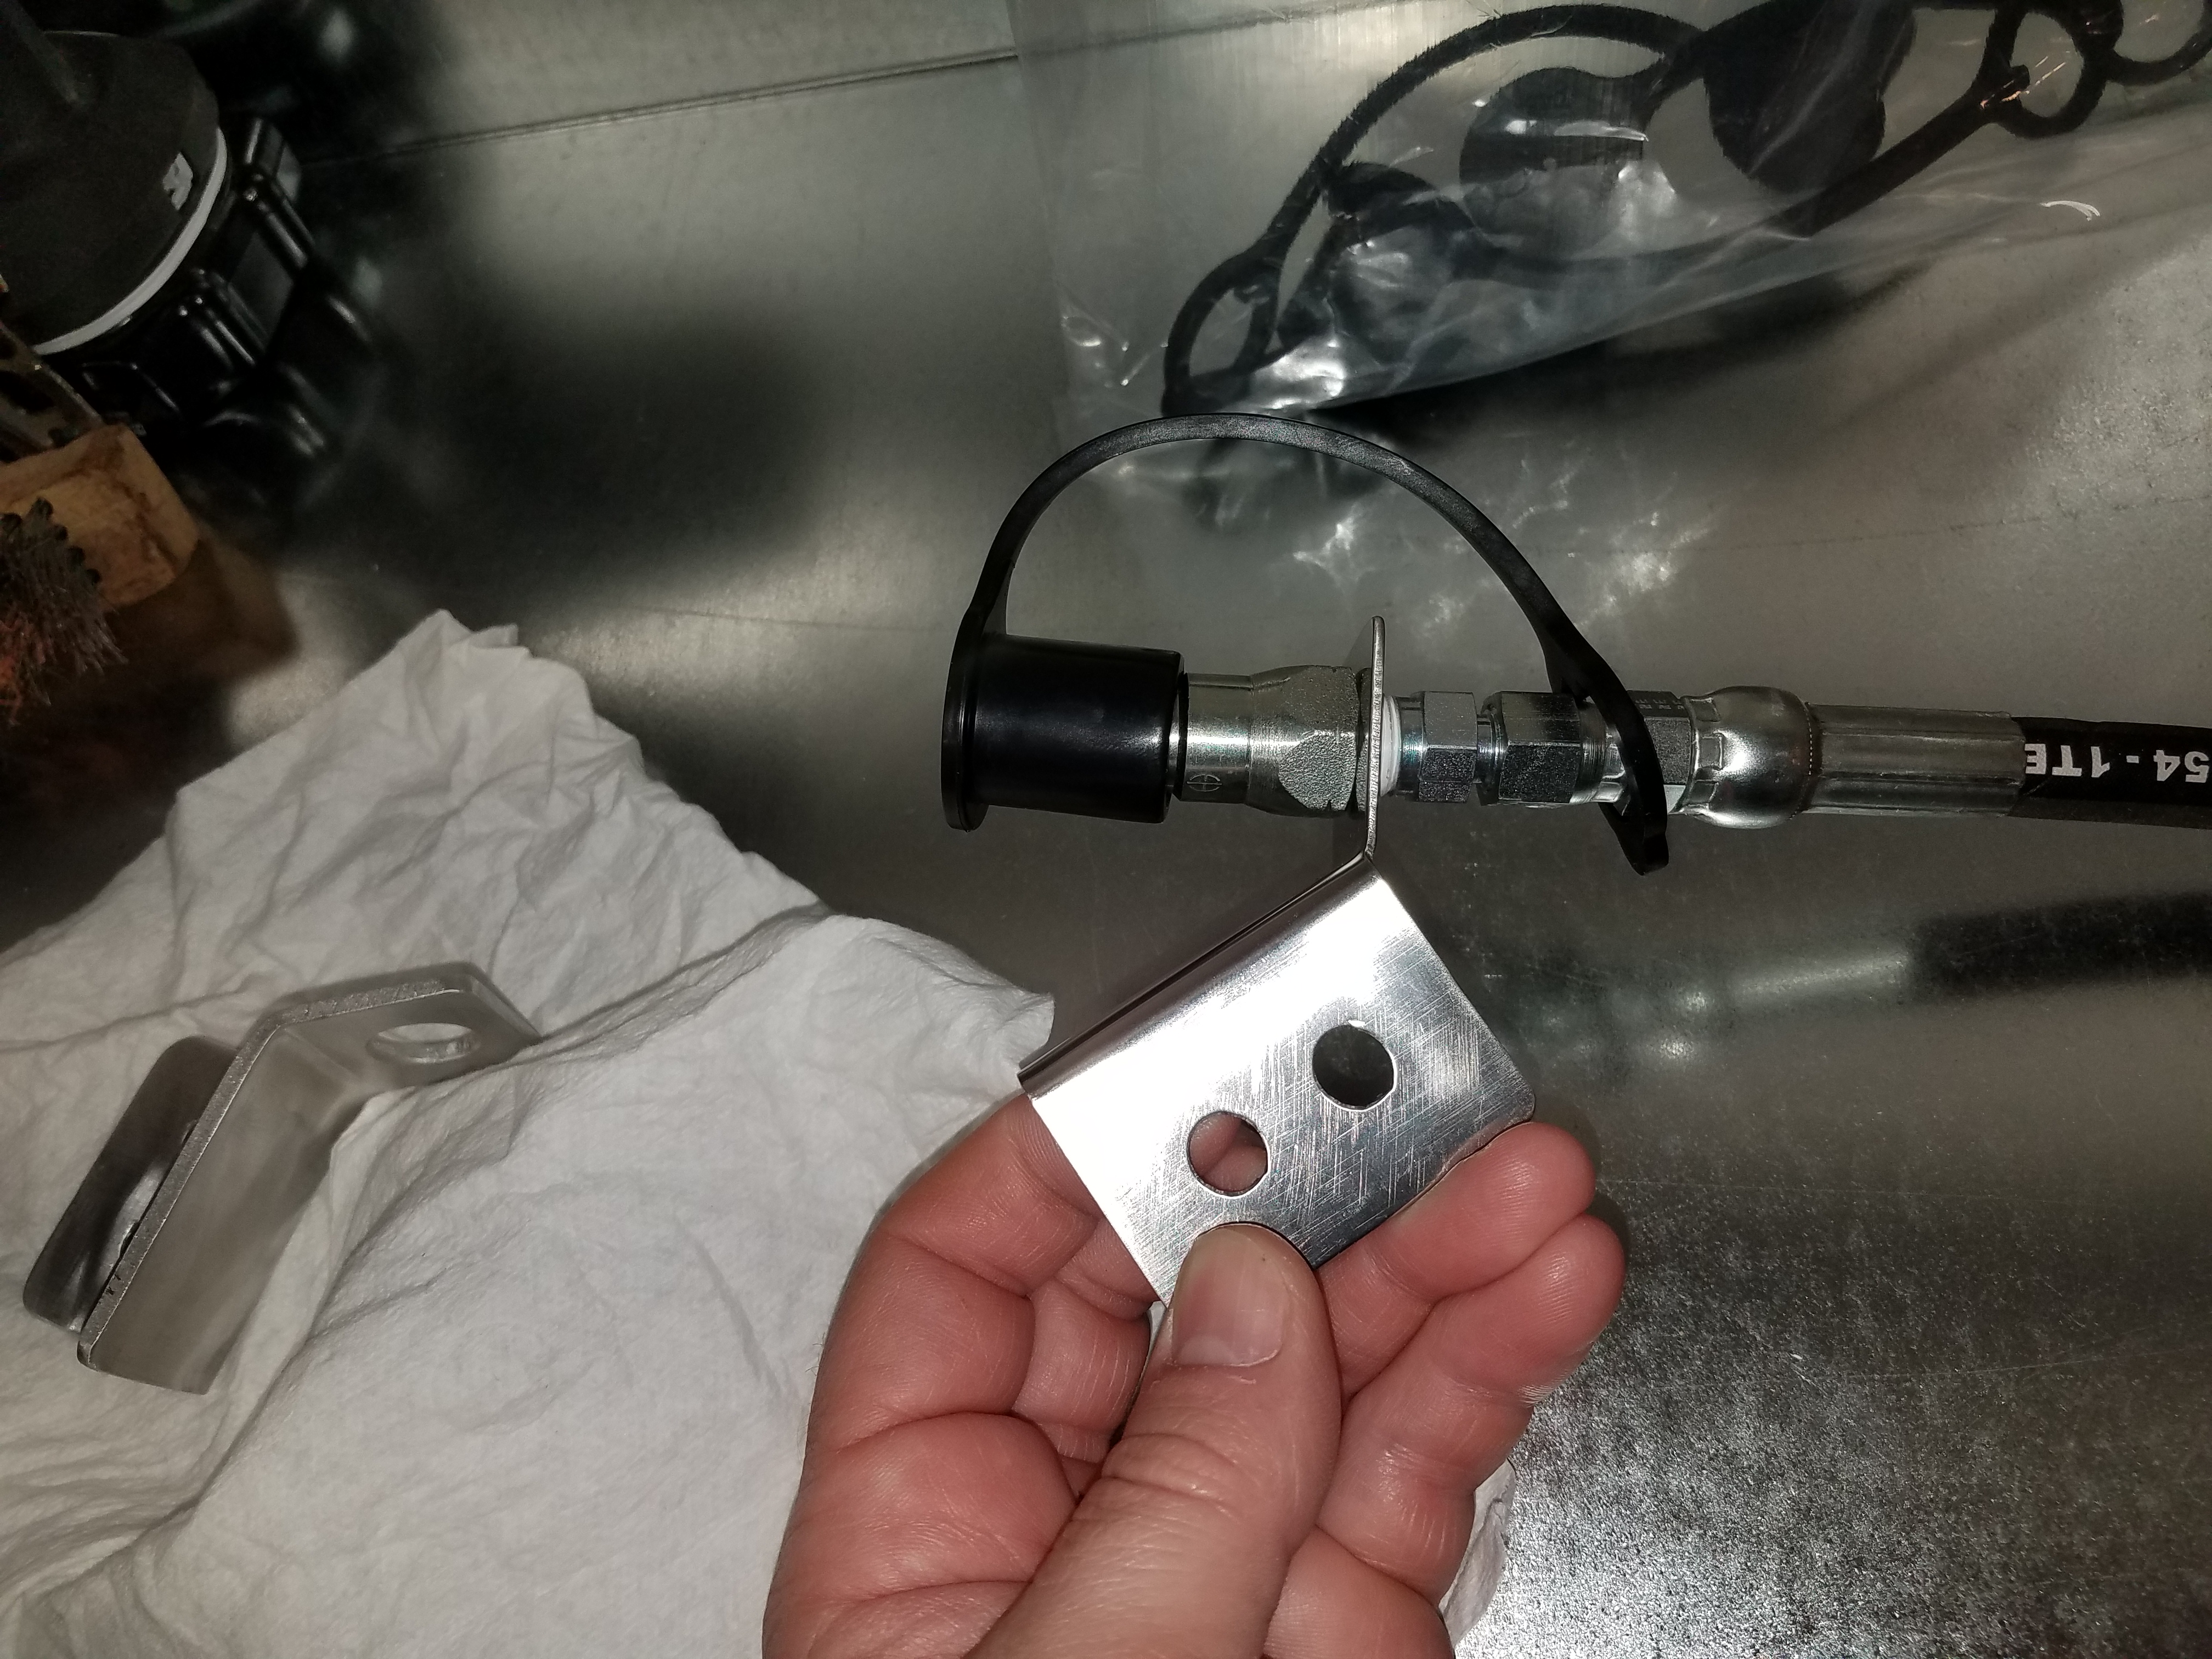
I'm in the process of designing a remote oil port up on top of the motor where you can gwt at it easier. It will be a hose that runs from the port that you talked about a the other end will be located at a much better place to access. Do you think there would be much interest in a product like this in the forum?
I think a lot of us would be interested, the $150. price x2 that Riva wanted just seemed like to much for most of us to justify,
Welcome to the group!
What would be the best way to advertise a kit for sale?
I looked on this site, and you are correct. The hose from surplus.com is about the 1/3 the price of the hose I purchased. This is great, I can pass the savings along to the next guy!You may be able to reduce costs by ordering them from surpluscenter.com.
if it's just to cover your costs and your just trying to help others out or willing to share your idea then I would think here or the classifieds would be a good place to post it,
if this is a business and your making money then the vendor forum would be the place to post it,
is this as simple as an adapter screwed into the engine, the hose attached to the adapter then the mount and quick disconnect? Of course you would need a quick disconnect to attach to your pump as well.
I wonder if there is room to install the adapter and quick disconnect directly to the engine? The hose seems like the most likely point of failure. It is under minimal pressure so heat and abrasion would be the risk factors. It would be less convenient to connect to the quick disconnect at the back of the engine but it would otherwise have similar benefits.
")
I'm just speaking for myself, but this is solving a problem that doesn't exist for me but others may find piece of mind getting as much oil out of the engine as possible. I probably would have less piece of mind thinking that all of my oil might leak out if I didn't install correctly or because of some failure, but that's just me
I'm totally with you on this. That being said you probably have never had water mix with your engine oil. When this happened to me, and I did a complete flush on the one engine I noticed a huge difference in the oil filthiness between the two motors. The one that had no water in it I only did the partial change and it was much dirtier than the motor that had water in the oil and got the complete flush. When I get done with the design I will need to be totally sure that the system will be bullet proof before I will ever sale a kit for this modification. If I have any doubt at all, I will not sale a single kit. I will run it on my personal boat for some period of time to prove the design is good. It definitely will not be for everyone and I'm ok with that. I guess I'm just a bit anal about this sort of thing.
A couple pictures of the bracket and the end of the remote relocation hose. I should be done by the end of summer with a finished product for sale. Still unsure about price, but will let people know as soon as I know. What would be the best way to advertise a kit for sale? Happy boating