- Messages
- 13,420
- Reaction score
- 13,537
- Points
- 857
- Location
- Royal, AR
- Boat Make
- Yamaha
- Year
- 2007
- Boat Model
- SX
- Boat Length
- 23
I drilled the holes one size larger, vacuumed them out then filled the holes with JB Weld Water Weld.

The Water Weld product was available at my local WalMart for around $6. It is a two part putty epoxy. You simply slice off a piece, I took about 3/8", and knead it with your fingers until it is all one color. It cures to an off white color. I rolled up pieces into cylinders and shoved them into each of the holes. I then used the back end of a smaller drill bit to push the first piece further in. Then I rolled up balls of the epoxy and pushed them into each of the holes until they were completely full. While the epoxy was still workable I took a paint scraper and smoothed the epoxy some. After it cured I used a razor scraper to work it smooth. I will be keeping the remainder of the Water Weld in the boat in case of any emergencies. I also have a similar Attwood product in the boat, but I was not sure how much I trusted it.
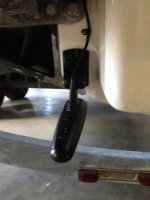
I placed the new transducer in a similar location so it covered the epoxy. I measured and drilled holes for the new transducer then filled each of the holes with Life Caulk and spread Life Caulk over the area of the filled holes. This is the end result. I believe the camera makes the transducer appear to be slanted but I will verify that it is level before testing it out. At this point I have only installed two of the mount screws for the transducer. I will install the third after verifying it functions correctly.


