• Welcome to Jetboaters.net!

    We are delighted you have found your way to the best Jet Boaters Forum on the internet! Please consider Signing Up so that you can enjoy all the features and offers on the forum. We have members with boats from all the major manufacturers including Yamaha, Seadoo, Scarab and Chaparral. We don't email you SPAM, and the site is totally non-commercial. So what's to lose? IT IS FREE!

    Membership allows you to ask questions (no matter how mundane), meet up with other jet boaters, see full images (not just thumbnails), browse the member map and qualifies you for members only discounts offered by vendors who run specials for our members only! (It also gets rid of this banner!)

    free hit counter

Yamaha 252XE Engine Alert

Just ordered the NOCO. I can let that charge the batteries back up before trying to fix this fault with cycling everything five times, right? Or do I need to charge it with a standard (non-trickle/smart) charger first for any reason?

Your batteries need to be fully charged first to eliminate low battery voltage as a possible cause for the alarm.

If you have a standard shop type charger you can use that of course, and a lot of home chargers are smart chargers as well. I’d get a hydrometer and use that to confirm the gravity is where it should be overall and that the cells are balanced.
 
@AceKicker - If you mount the charger where I shared in my picture (adjacent to the battery switches) and you can use a wood style stainless screw and you’ll be all set. That panel is high-density polyethylene (HDPE) aka “starboard”. Just confirm there is nothing on the other side, and you’ll probably need a 3/4” length screw to fasten the charger. You can start with a small pilot hole, then follow with the screw. If you are more comfortable going the route you mentioned, a bolt with washer and nut on the back and can certainly do that as well.

Completely understand you hesitation and uncertainty, and appreciate the How I met your mother throw back!
 
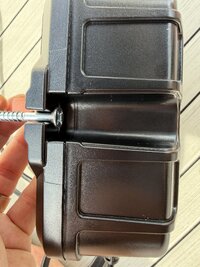
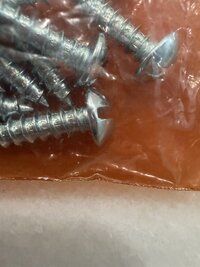
I'm buying the NOCO smart charger. I am REALLY a rookie with some of these things. For example, yesterday I looked up several smart charger installation videos just to see how they attach them to the boat. I'm thinking it needs a nut to hold the screws in place, or a toggle bolt. But I'm not sure. And the only thing I have found remotely related to mounting the hardware is to be careful with NOCO's included screws because they might be too long and go into a ballast (or bilge) area. The videos all explained how to hook up the NOCO to the battery terminals, which seems like the easy part to me, but they all skipped past the hardware mounting. And I thought I understood the DVSR, but the more threads I've read through on here, the more confused I've become. It's been quite awhile since my freshman year Introduction to Electrical Engineering class.
There are lots of useful threads that all have to do with this issue of low voltage and getting a smart charger and what to do with the DVSR, but I can't find a dedicated thread, except one that was started 8 years ago that appears to be on a system that's hooked up differently than the new boats.
So, I plan to start a new thread and explain what I'm doing and asking my questions there to keep it organized for people with these questions in the future. I'm going to wait a little bit, though, in case I've missed the info in some other thread that one of you knows about.


Side note: My"gap" is doing "handyman" type stuff. Unrelated to boats, for anyone wanting comedic relief, this is an episode from about 20 years ago where it explains how every person has a glaring lack of knowledge about something that is common sense to everyone else. If you watched "How I Met Your Mother" back when it was on, you'll appreciate this.
Here is the new thread for anyone interested: Low Voltage / Engine Fault / NOCO Install 2026 252SD
 
Last edited:
@AceKicker - If you mount the charger where I shared in my picture (adjacent to the battery switches) and you can use a wood style stainless screw and you’ll be all set. That panel is high-density polyethylene (HDPE) aka “starboard”. Just confirm there is nothing on the other side, and you’ll probably need a 3/4” length screw to fasten the charger. You can start with a small pilot hole, then follow with the screw. If you are more comfortable going the route you mentioned, a bolt with washer and nut on the back and can certainly do that as well.

Completely understand you hesitation and uncertainty, and appreciate the How I met your mother throw back!
Are you saying stainless steel wood screws will work better for HDPE than the two #8x1" Self-tapping screws? And there won't be need for a bolt and washer? Did you use a washer and nut on the backside?

Did you have to drill a hole to thread the cables from the NOCO to the engine bay? I haven't had a chance to go check out my boat more closely yet to see if there is room to thread it through already, and hoping to bring all the tools I need on the first trip.
For the hardware, I can’t speak to the merits of whats best, I would it’s a matter of preference. I got tired of running to Ace, so I purchased the is size #10. Believe I used the 3/4 inch length. No washer/nut.

Also I was able to pass the wires through the same passage as where the battery cables run to the on/off switch. You might want to consider using wire loom or something similar to prevent wire chaffing.

1776644811764.png
 
If you mount the charger where I shared in my picture... Just confirm there is nothing on the other side, and you’ll probably need a 3/4” length screw to fasten the charger.
How did you confirm there was nothing on the other side? Just a small pilot hole to see if you felt resistance? I might be able to get my phone in the gap where the cords went to the engine bay and if I can do that, I can get a picture of it. Do you have any better ideas?
 
How did you confirm there was nothing on the other side? Just a small pilot hole to see if you felt resistance? I might be able to get my phone in the gap where the cords went to the engine bay and if I can do that, I can get a picture of it. Do you have any better ideas?
Apologies for the delayed response, traveling for work.

You can access both sides of that panel, one via the underseat storage where the switches are and the other side via the engine compartment.

If you use a screw that isn’t too long, the you should be fine. Where the battery cable are passed through you can get an idea for how thick that panel is.
I was worried about the void space between the space with the batteries and the engine compartment. I was checking it out more closely yesterday. I bought #10 3/4" screws. It looked like after including the width of the part of the NOCO I'd be fastening, 3/4" would leave a little bit of that HDPE without a screw in it. The #8 1" that came with the NOCO was a little smaller. And the self tapping part means part of it didn't have threads. If I am not going to put a nut on the backside, I want as much thread into the boat as possible because that NOCO is heavy.
So, I'm going to get a #10 1" that is rounded because I think that will fit into the NOCO better (see picture) than one that is flat on the inside of the head. A 1" will have a tiny part of the screw going through the material into that void area. I am not concerned about that tiny amount puncturing anything.
 

Attachments

  • Rounded (Not flat).jpeg
    Rounded (Not flat).jpeg
    2.3 MB · Views: 3
  • Flat.jpeg
    Flat.jpeg
    1.2 MB · Views: 3
Back
Top