• Welcome to Jetboaters.net!

    We are delighted you have found your way to the best Jet Boaters Forum on the internet! Please consider Signing Up so that you can enjoy all the features and offers on the forum. We have members with boats from all the major manufacturers including Yamaha, Seadoo, Scarab and Chaparral. We don't email you SPAM, and the site is totally non-commercial. So what's to lose? IT IS FREE!

    Membership allows you to ask questions (no matter how mundane), meet up with other jet boaters, see full images (not just thumbnails), browse the member map and qualifies you for members only discounts offered by vendors who run specials for our members only! (It also gets rid of this banner!)

    free hit counter

Thoughts on Gelcoat repair on bottom of boat......

YamaHog

Jet Boat Addict
Messages
162
Reaction score
113
Points
112
Location
Little Rock, AR
Boat Make
Yamaha
Year
2020
Boat Model
Limited S
Boat Length
19
As some of you may recall, I had a beaching incident at the end of last season when a local lake water level was low. Killed my impeller and wear wring, but during the off-season I pulled the jet pump and replaced the wear wing and installed a new Solas impeller. The remaining repair work is one the bottom of the boat hull from where I was beached on a muddy flat with some smaller rocks. Most of the scratches came from trying to rock the boat loose, and then being towed off the muddy flat. Luckily no serious fiberglass damage occurred, but I did end with some nasty scratches running the full length of the keel, some deep enough that filling them is needed rather than just sanding them out. I ordered two 2 patch paste repair kits from Spectrum and used a plastic spreader to apply the patch paste after roughing up the area on the hull and wiping it clean with acetone.

I started wet sanding by hand today, but it's killing my neck and shoulder trying to do this laying on my back under the boat. I ran a little short on patch paste so may have to order another kit but I didn't want to end up with too much initially as ;the kits are only good for 6 months.

It still looks really ugly but it's on the bottom of the boat. What would you guys do? I'm thinking of doing minimal sanding on it, polishing to gloss it up so it doesn't look dull, and enjoying the boat this season.

As far as a more permanent long-term repair (to make it like new) I'm assuming I'd need to have a repair shop spray the entire keel with fresh gelcoat to level off any remaining scratches and then sand/polish/buff. I have no idea how much this will cost, but it doesn't sound cheap. I'm assuming a repair show will be able to put the boat on stand or something so it easier to work on.

I just can't do it laying underneath the trailer. Scary pics below :) Others thoughts' are appreciated.
 

Attachments

  • PXL_20230613_211819486.jpg
    PXL_20230613_211819486.jpg
    212.5 KB · Views: 83
  • PXL_20230613_211826864.jpg
    PXL_20230613_211826864.jpg
    247.7 KB · Views: 83
  • PXL_20230613_211846900.jpg
    PXL_20230613_211846900.jpg
    287 KB · Views: 82
  • PXL_20230613_211856033.jpg
    PXL_20230613_211856033.jpg
    298.2 KB · Views: 74
Why aren't you buying tools to make this job go more quickly, smoother, and can be used for future gelcoat repair?


Your project would take longer to apply the patch paste than to sand out.

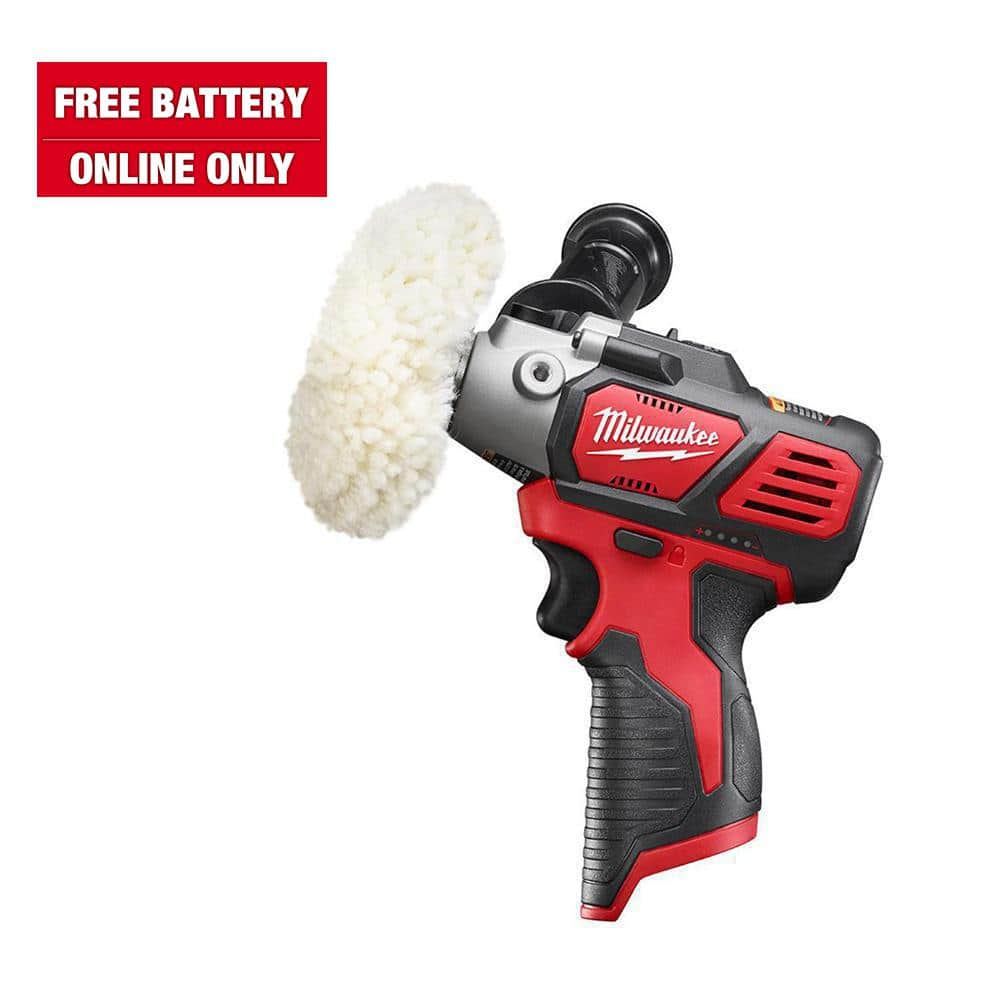
There are additional items needed to allow using generic bulk pad kits from Amazon, or you could get the bulk pads and use a drill with a 3-jaw chuck instead of buying the Milwaukee polisher. That's what I did with my first repair to test the waters, and it sold me on adding the purpose-built Milwaukee tool.
 
Get yourself the right tools. Make sure you have enough gel coat patch and do it right. It will look fine.
 
Why aren't you buying tools to make this job go more quickly, smoother, and can be used for future gelcoat repair?


Your project would take longer to apply the patch paste than to sand out.

There are additional items needed to allow using generic bulk pad kits from Amazon, or you could get the bulk pads and use a drill with a 3-jaw chuck instead of buying the Milwaukee polisher. That's what I did with my first repair to test the waters, and it sold me on adding the purpose-built Milwaukee tool.

@drewkaree ,

I actually do have a rotary polisher/sander that should fit the bill. I guess I just need to order some hook and loop sanding pads for it. Probably 400, 600, 800, 1000 grit at least. Maybe I can find a kit with multiple grits going up to 2000 grit. I have the polisher/sander linked below:


I've been hesitant to do any "machine sanding", but it would definitely make this job go much faster. It sounds like you've done a similar repair before. Any tips on what RPMs I should be using when machine sanding and recommended grits?

I'm going to order some more gelcoat patch paste kits (2 more to be safe) from Spectrum, but it will be a few weeks before those get delivered. I wish you could get the paste paste in slightly larger quantity kits, but understand it's typically for smaller repairs.

My biggest issue with this repair is trying to work under the boat laying on my back. Any suggestions of a safe way to gain more room to work? I've heard of people making car ramps by stacking 2 x 6"s. Not sure of safe way to raise the trailer to get more room to work.

I just want to be careful using a machine sander so I don't take too much material off a time. Definitely will beat the hand sanding though!
 
Get yourself the right tools. Make sure you have enough gel coat patch and do it right. It will look fine.

I think that is my plan now. Just have to get over my fear of using the machine for the sanding. :) As there's no damage into the glass, I don't think I should have any issues with using the boat in the meantime. I still haven't taken it out yet this season and am eager to take my nephews fishing/tubing after doing a test run with my new impeller/wear ring.
 
Over that area, I fully agree it should take you longer to spread that thick paste than to sand it out. In fact, for that area, were you starting from scratch, I probably would have recommended normal gelcoat and a Perval sprayer. But I don't think you want to go back on that part now. Stick with the paste and finish the job. Biggest thing I think you need to worry about there is with the medium scratches. Light ones should be no issue, but usually with a deeper scratch you want to widen it so that the gelcoat can stick. Most of yours look very light. Just watch out for deeper ones; I used a Dremel on mine for those few.

I'm trying to recall what grit I started with when I used the rotary. I am not saying I did it right, but I want to say that I started pretty high--like 800+. Particularly if you don't have anything very bumpy. You will want to get to the wool pads with compound and then polish pretty quickly. Your biggest risk is taking off all of what you just put on (esp if you are at like 400 grit with a power tool...).

I can confirm none of that looks like it is down to the glass, so running it as is should be fine.
 
@drewkaree ,

I actually do have a rotary polisher/sander that should fit the bill. I guess I just need to order some hook and loop sanding pads for it. Probably 400, 600, 800, 1000 grit at least. Maybe I can find a kit with multiple grits going up to 2000 grit. I have the polisher/sander linked below:


I've been hesitant to do any "machine sanding", but it would definitely make this job go much faster. It sounds like you've done a similar repair before. Any tips on what RPMs I should be using when machine sanding and recommended grits?

I'm going to order some more gelcoat patch paste kits (2 more to be safe) from Spectrum, but it will be a few weeks before those get delivered. I wish you could get the paste paste in slightly larger quantity kits, but understand it's typically for smaller repairs.

My biggest issue with this repair is trying to work under the boat laying on my back. Any suggestions of a safe way to gain more room to work? I've heard of people making car ramps by stacking 2 x 6"s. Not sure of safe way to raise the trailer to get more room to work.

I just want to be careful using a machine sander so I don't take too much material off a time. Definitely will beat the hand sanding though!

My previous jobs, I used a right angle Milwaukee drill and a 3" pad kit, with some wet/dry by hand, as I didn't have the 3" paper. The speed isn't fast enough to do quick damage like your 7", but the size is nice enough to make for easy handling.

I did use the paper under a foam pad to help it go faster, and as a kind of test to see if I should get the M12 polisher, and I was convinced. I've used that polisher for headlight restoration and 2 small gelcoat areas I tested, once I got some 3" paper, and IMO, it's perfect for guys like us, with stuff like this. It's manageable, and fast enough for these things without being too fast that a novice would do damage. It's also perfect, size-wise, for laying on your back.

Adding a UVEX face shield is also a great idea, but I had some claustrophobic feelings at times - no reason, and completely unfounded, but the size of it was disconcerting at times. Still, keeps your face from getting covered! My Trend Shield would be better in every way, but I didn't want to have to replace the filters so quickly, so I tried the UVEX. It's a great solution for keeping your face clean
 
Why aren't you buying tools to make this job go more quickly, smoother, and can be used for future gelcoat repair?


Your project would take longer to apply the patch paste than to sand out.

There are additional items needed to allow using generic bulk pad kits from Amazon, or you could get the bulk pads and use a drill with a 3-jaw chuck instead of buying the Milwaukee polisher. That's what I did with my first repair to test the waters, and it sold me on adding the purpose-built Milwaukee tool.

I will probably have to invest in that Milwaukee tool to fix all of my learning marks. How many extra pads should I get? Do I need to get sanding pads and a different base?
 
Thanks @drewkaree for details on the M12 Polisher/Sander. I've got several other M12 tools and have looked at this one a couple of times. Last time I did some gelcoat repair I used a variable 1/4" hex M12 drill I already owned M12 Variable Hex drill with a Groits polisher adapter bit
Groits adapter bit
And an adapter plate with hook/loop
2" Adapter plate and 3" Adapter Plate

Here's a multipack of 3" sandpaper on Amazon. I can't vouch for it, but I guess they do make it
3" High Grit Sandpaper hook/loop


Variable trigger controls the speed, though I wasn't the best at it I didn't cause any damage by taking my time. Found several sources online for the hook/loop sanding pads as well as polishing ones. For the really fine stuff I did wet with a block by hand as I didn't find any of the really fine stuff for 2" or 3" adapter plates the last time I looked, but the link I've found here it looks like I didn't look hard enough.

TBH, the whole time I was thinking about this M12 polisher mentioned here more than once. But again just took my time and knocked it out.

Love the facemask idea, I've got some additional to do this year where that idea will come in real handy! Thanks @drewkaree!!
 
Last edited:
I will probably have to invest in that Milwaukee tool to fix all of my learning marks. How many extra pads should I get? Do I need to get sanding pads and a different base?

I have to remember to respond to this when I get home and have my laptop - the phone and service here makes for brutal forum use for anything other than text responses.

Milwaukee sells additional kits for a ridiculous $67-ish, for the exact same setup that they ship with the unit. Spending $20 for adaptors allow you to buy the generic $20 kits and replacement velcro backing plates, and/or another $20 for collets. Depends on what you need, and how it's offered, but for an additional $40 for 4 pieces, you're completely covered for whatever is available. I'll try to remember to post links when I get home, as it's an odd size, both for the threading into the Milwaukee tool, and the other pads.

They have adaptors that let you bump up to 5",but it really isn't designed to properly utilize that size, and I think you'd be better served with a different machine if you want 5" pads
 
Over that area, I fully agree it should take you longer to spread that thick paste than to sand it out. In fact, for that area, were you starting from scratch, I probably would have recommended normal gelcoat and a Perval sprayer. But I don't think you want to go back on that part now. Stick with the paste and finish the job. Biggest thing I think you need to worry about there is with the medium scratches. Light ones should be no issue, but usually with a deeper scratch you want to widen it so that the gelcoat can stick. Most of yours look very light. Just watch out for deeper ones; I used a Dremel on mine for those few.

I'm trying to recall what grit I started with when I used the rotary. I am not saying I did it right, but I want to say that I started pretty high--like 800+. Particularly if you don't have anything very bumpy. You will want to get to the wool pads with compound and then polish pretty quickly. Your biggest risk is taking off all of what you just put on (esp if you are at like 400 grit with a power tool...).

I can confirm none of that looks like it is down to the glass, so running it as is should be fine.

Thanks for the advice! I learned something today. I didn't know the Preval Sprayer was a thing! I was thinking to spray regular gelcoat I'd have to have a compressor and a spray gun setup. Very cool product! I'm far enough in now though like you said that I should probably just finish with the patch paste. I'm debating on using my 7" rotary for this. Have to do some more reading to find what RPMs would be safe, and it may be a bit unwieldy under the boat. I may end up going the drill route with a 3" pad attachment. I like the idea of having a polisher/sander that size, but it isn't the best time to drop $100+ on a tool I'm not going to use much after this repair. Also, it does make logical sense to start with a higher grit paper on a power tool. The higher grit removes less material at a time, but the machine is doing the work, not your shoulder!
 
My previous jobs, I used a right angle Milwaukee drill and a 3" pad kit, with some wet/dry by hand, as I didn't have the 3" paper. The speed isn't fast enough to do quick damage like your 7", but the size is nice enough to make for easy handling.

I did use the paper under a foam pad to help it go faster, and as a kind of test to see if I should get the M12 polisher, and I was convinced. I've used that polisher for headlight restoration and 2 small gelcoat areas I tested, once I got some 3" paper, and IMO, it's perfect for guys like us, with stuff like this. It's manageable, and fast enough for these things without being too fast that a novice would do damage. It's also perfect, size-wise, for laying on your back.

Adding a UVEX face shield is also a great idea, but I had some claustrophobic feelings at times - no reason, and completely unfounded, but the size of it was disconcerting at times. Still, keeps your face from getting covered! My Trend Shield would be better in every way, but I didn't want to have to replace the filters so quickly, so I tried the UVEX. It's a great solution for keeping your face clean

Good idea on the face shield! I'm going to at least throw on some safety goggles to keep that stuff out of my eyes! Really appreciate all the feedback. Feeling a little better about this repair now. Just not super-fun laying under the boat on your back sanding. I guess I'm getting old! :)
 
I have to remember to respond to this when I get home and have my laptop - the phone and service here makes for brutal forum use for anything other than text responses.

Milwaukee sells additional kits for a ridiculous $67-ish, for the exact same setup that they ship with the unit. Spending $20 for adaptors allow you to buy the generic $20 kits and replacement velcro backing plates, and/or another $20 for collets. Depends on what you need, and how it's offered, but for an additional $40 for 4 pieces, you're completely covered for whatever is available. I'll try to remember to post links when I get home, as it's an odd size, both for the threading into the Milwaukee tool, and the other pads.

They have adaptors that let you bump up to 5",but it really isn't designed to properly utilize that size, and I think you'd be better served with a different machine if you want 5" pads

I was wondering what that $20 adapter that I saw on Ebay was for for the M12 polisher! Now I get it. Thanks!
 
Good idea on the face shield! I'm going to at least throw on some safety goggles to keep that stuff out of my eyes! Really appreciate all the feedback. Feeling a little better about this repair now. Just not super-fun laying under the boat on your back sanding. I guess I'm getting old! :)

I use my creeper if it's up front under the boat. It's no fun trying to get on/off of it while it's under the trailer/boat, but once on it it works like a champ for me. My creeper has an adjustable upper section so it can lift me up higher from waist up. Maybe an option.
 
I will probably have to invest in that Milwaukee tool to fix all of my learning marks. How many extra pads should I get? Do I need to get sanding pads and a different base?

So this is all for the Milwaukee m12 polisher, although the pad kit I originally bought will work with any drill with a 3-jaw chuck - I did a similar thing @Tjw961 did, and used a right-angle drill that I already had. I could have saved myself some money by just jumping straight to the polisher, but the pad set was only $10 at the time.

The original pad kit I got was this, and I bought wet/dry paper separately, using these pads to compound & polish after sanding (hit the link, and they'll have other suggestions, as these are no longer offered, but it's just a generic Chinese kit like this one, as an example) Those had a solid smooth shaft, which is why you needed the 3-jaw chuck, but they make a collet for the polisher, if you prefer the smooth shaft vs threaded products.

IF you end up with the polisher, you can use the pads that come with it, but you'll need more as you consume the 3 pads they include with the kit, and like I mentioned, they have them priced at a ridiculous $70 for the Milwaukee-branded kit. Search Amazon for "Milwaukee m12 Polisher pad", and you can find a ton of pad kits. I have no way of knowing what does or does not work with the Milwaukee tool without reading the specs, which you can do as well, so I'm just giving you what I ended up with that works.

Milwaukee has an odd size thread for the polisher, likely to try to force you to use their expensive replacements, but you can get other velcro pads, and adapters to allow much less expensive alternatives. I went with these velcro pads, to allow easy pad changes, and that mated up with this adapter, to screw directly into the Milwaukee polisher

Lastly, @WiskyDan had a hand sander version of this kit, and in looking for what it included, I stumbled across a kit that would work in the polisher, so I grabbed that, and the adapter as well. This kit has wet/dry paper, a velcro pad to allow easy changes, and several options for mounting to the polisher. It comes with a smooth shaft that can be used with the collet linked above, or you can remove the threaded nub in the pad, and grab this adapter to thread directly to the pad

After all is said and done, you can just pick one method for attaching to the polisher and skip all the extra adapters, but I got the adapters, not knowing just what would work, and I figured I would just send back what I wasn't going to use. I decided to keep all the adapters, in the event Amazon doesn't have a kit at the time I would need it, I'm covered. The outlay was an additional $30-40 for the adapters, and I figured they would pay for themselves by not having to shell out $70 every time just because it had a fancy logo on it.

This may be a lot to follow, so I can help if anyone has questions regarding how to determine what to look for, but as long as you can suss out the thread pitch and size needed to interface with the Milwaukee polisher, you can cobble together a cheap and effective kit with the info I've linked above.

Last item - the UVEX face shield (or Honeywell, depending on how it's listed) Mine is a work mask, so it didn't cost me anything, but I can't put into words how it feels. It feels huge when it's on, and you're in a limited space, but the size kinda "disappears" after you've had it on for a while, and you stop noticing it. They make plenty of consumables for it, and I'd recommend you get the "screen protector" stickers for it to limit having to replace the visor shield. The cost is generally tied directly to the type of visor you get - polycarbonate is more expensive, the tinted versions are somewhere in the middle, and the generic visor that's perfect for weed whacking around the yard or sanding gelcoat under the boat is generally $30 all day, every day. They have newer, cheaper & smaller face shields that should work just as well, but the UVEX shield is the Kleenex version of face shields - you should be able to find consumables for the UVEX far easier, maybe even at your local B&M, versus having to replace the whole shield of the AlphabetChinaVendor masks.

Hit me up when this is too much to take in, and you have questions! ?
 
Back
Top