• Welcome to Jetboaters.net!

    We are delighted you have found your way to the best Jet Boaters Forum on the internet! Please consider Signing Up so that you can enjoy all the features and offers on the forum. We have members with boats from all the major manufacturers including Yamaha, Seadoo, Scarab and Chaparral. We don't email you SPAM, and the site is totally non-commercial. So what's to lose? IT IS FREE!

    Membership allows you to ask questions (no matter how mundane), meet up with other jet boaters, see full images (not just thumbnails), browse the member map and qualifies you for members only discounts offered by vendors who run specials for our members only! (It also gets rid of this banner!)

    free hit counter

Bow seat backrest hinge mod

@Eric Ballard Perhaps mount the magnets where the holes are?

Also, I assume you didn't go for a side hinge as I notice that the cushion isn't a straight line on the gunnel side?
 
I also got some magnets to cover the bolt holes coming tomorrow too.
 
I lined my storage compartments and it has been nice not tearing up my fingers with getting stuff in and out. Nice mod!
 
@Eric Ballard Perhaps mount the magnets where the holes are?

Also, I assume you didn't go for a side hinge as I notice that the cushion isn't a straight line on the gunnel side?
Yep, I got 1.26" diameter magnets that will go over the bolt holes and washers on the backrest. I'm also looking at gas struts as a bonus.

All will be installed tomorrow!
 
@Eric Ballard Perhaps mount the magnets where the holes are?

Also, I assume you didn't go for a side hinge as I notice that the cushion isn't a straight line on the gunnel side?
Yes, the gunwale side of the backrest is not flat and is a weird angle. Also, this way allows the backrest to open more too I think.
 
Something lower profile than a gas strut could be torsion springs. How heavy is the seat back?

torsion-spring-01.jpg


I wish the damn glove box had these instead of the funky Yamaha kung fu spring.
 
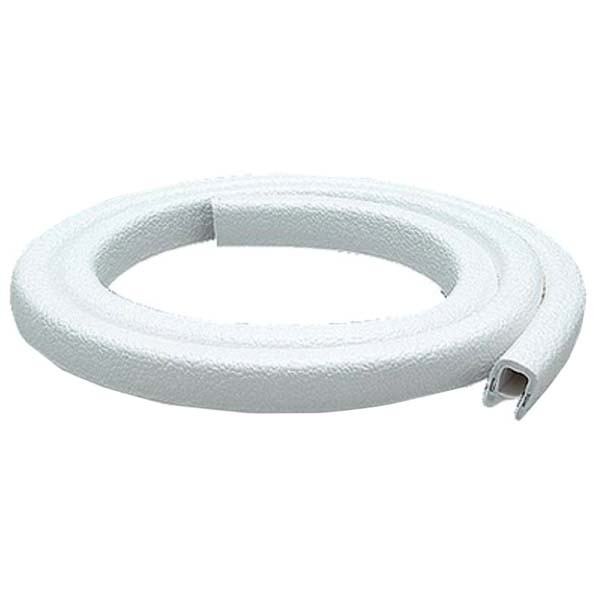
One thing I've always wanted to do was line all the storage compartment openings with vinyl edging to save from those rough edges or raw fiberglass cuts. With your backrest mod I can see myself using that area a lot for trash can and such so this would be a nice way to finish it off for a clean look and protection. https://www.wholesalemarine.com/bec...e-17929.html?gclid=CIfhn5zkqdQCFYg6gQod6u4AZw

bec-t-3w__98237.1469113225.1280.1280.jpg
I like the idea of using the TrimLok on the other openings. I got 25 feet so I have some extra to play with.
 
Yep, I got 1.26" diameter magnets that will go over the bolt holes and washers on the backrest. I'm also looking at gas struts as a bonus.

All will be installed tomorrow!

@blacksapphirez put in a gas strut on his anchor locker, but I'm quite sure the parts list would work for your application as well.
 
Success, I'm 90% done. Just need to fill some screw holes, finalize the Trim-Lok and tweak the magnet system. I thought the magnets were too strong so I submerged some metal washers in epoxy, but I need bigger washers or less epoxy over the washers. The washers should be a fairly easy fix. I like the magnets and the whole thing turned out great. Trim-Lok is great, but hard to cut and I could not get it around the one magnet Like I wanted to, but I will find a better way to trim it to fit better. The trash can fits great in there, just need to find a way to secure it better.

20170607_223916.jpg 20170607_155907.jpg 20170607_155910.jpg 20170607_155945.jpg 20170607_165034.jpg
 
awesome idea!
 
Success, I'm 90% done. Just need to fill some screw holes, finalize the Trim-Lok and tweak the magnet system. I thought the magnets were too strong so I submerged some metal washers in epoxy, but I need bigger washers or less epoxy over the washers. The washers should be a fairly easy fix. I like the magnets and the whole thing turned out great. Trim-Lok is great, but hard to cut and I could not get it around the one magnet Like I wanted to, but I will find a better way to trim it to fit better. The trash can fits great in there, just need to find a way to secure it better.

View attachment 57294 View attachment 57295 View attachment 57296 View attachment 57297 View attachment 57298
I really like your mod. I have a 212x, it has lots of room in that area but really no good way to access it. Taking the cushion off fully is a pita. Can you post links to the parts that you used? I'm try to get this done, thanks.
 
Any tips you used to determine the location and height of where to drill and mount the hinges so that when you close the seat down it lines up like stock?
 
☝️What he wrote. That was going to be my next question, thanks.
 
Any tips you used to determine the location and height of where to drill and mount the hinges so that when you close the seat down it lines up like stock?
Yes, sorry. I located where I wanted the hinges to fall on the seat back and screwed them in. You will want the hinge to be as close to the seat back piping edge as possible to all as much travel as possible.

I put then used double sided Command Strip squares on the large 3 hole side of the hinges. I then placed the seat back in place using the preexisting bolts to get the seat back into the right spot (I cut the bolt lengths shorter with a hacksaw so the seat back could open on the hinges). I then pushed real hard to get the Command Strips to hold and opened the seat back on the hinges and marked the holes. I pre-drilled and locked it down.

Word of warning, the bolts are obviously smaller than the whole they go into so make sure the seat back is where it belongs. Use the port side seat back as a guide. I think mine is a little bit crooked, but I think only I will notice it.

If I missed something let me know.
 
This is what the hinges look like from above to help with how hight they need to go on the cushion.

20170604_160805.jpg
 
Yes, sorry. I located where I wanted the hinges to fall on the seat back and screwed them in. You will want the hinge to be as close to the seat back piping edge as possible to all as much travel as possible.

I put then used double sided Command Strip squares on the large 3 hole side of the hinges. I then placed the seat back in place using the preexisting bolts to get the seat back into the right spot (I cut the bolt lengths shorter with a hacksaw so the seat back could open on the hinges). I then pushed real hard to get the Command Strips to hold and opened the seat back on the hinges and marked the holes. I pre-drilled and locked it down.

Word of warning, the bolts are obviously smaller than the whole they go into so make sure the seat back is where it belongs. Use the port side seat back as a guide. I think mine is a little bit crooked, but I think only I will notice it.

If I missed something let me know.
Thanks for the help.
 
I know this is a question on an old thread, but curious if anyone has tried this mod on 2015 / 2016 192 series boats with the updated interior trim? The seat cushions are taller than previous 192's and 190's, to the point that it may interfere with completely opening the cushion as it relates to the vertical edge of the decking near the windshield behind the cushion. The mod shows short throw hinges and they're already placed as close to the edge of the back of the cushion as possible. I am waiting for ice out up here in Central NY so I can test drive and bring home a 2015 SX192, so I don't have a way to evaluate at this time but am interested in this mod. Thanks in advance for any and all replies!
 
Last edited:
@Eric Ballard Just seeing this post. Man this is awesome and I hope to do the mod. So will will be reaching out with questions.. So I will apologize now as I am not as crafty as you!! See you in 2 weeks at Kerr.
 
Back
Top