• Welcome to Jetboaters.net!

    We are delighted you have found your way to the best Jet Boaters Forum on the internet! Please consider Signing Up so that you can enjoy all the features and offers on the forum. We have members with boats from all the major manufacturers including Yamaha, Seadoo, Scarab and Chaparral. We don't email you SPAM, and the site is totally non-commercial. So what's to lose? IT IS FREE!

    Membership allows you to ask questions (no matter how mundane), meet up with other jet boaters, see full images (not just thumbnails), browse the member map and qualifies you for members only discounts offered by vendors who run specials for our members only! (It also gets rid of this banner!)

    free hit counter

How to: beginner FRP repair in the driveway

CrankyGypsy

Jetboaters Captain
Messages
352
Reaction score
296
Points
202
Location
Tampa, FL 33615
Boat Make
SeaDoo
Year
2008
Boat Model
Challenger
Boat Length
18
i'm finally posting the pics and my steps for the process i used to repair/replace some FRP winter 2014-2015. i successfully made it through several seasons without any indication of failure of the repaired areas. in the end, the engine bay actually looks better than it did from the factory. it has been through some rough swells and i never once worried about taking it easy due to the repairs.

unfortunately, there were days i just didn't bother to take pictures. i am also missing a few of the photos i took on an old phone. this was my first Yamaha boat (or any boat for that matter) and i had noticed the FRP/gelcoat was different at the very back of the engine bay. at first i thought there was a repair here, but after seeing a few pics of other 2005 boats, this appears to be how the factory installed it. i didn't like the look of it, so i decided to redo this entire section while i was in there. also, i could not find anything underneath that could give a clue to a reason for a repair - the hull looked unscathed here and the materials (specifically the green/grey compound) appear to be the same in other areas of the boat ...re-affirming my belief it came like this from the factory. they must've decided to alter something at the end of the 2005 production year?

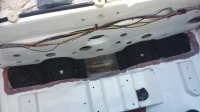
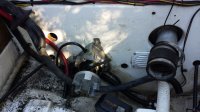
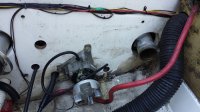
here's two pics of the transom area with the engines pulled. you can see the bearing housings were leaking grease - the vulcanized rubber probably separated years ago. i took the opportunity to replace portions of, and realign, the drivetrain. i also yanked the engine bay carpet and did an extensive noise reduction project:
1.jpg

2.jpg

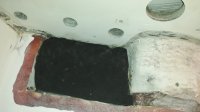
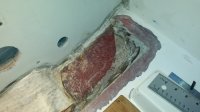
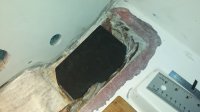
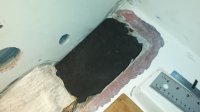
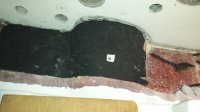
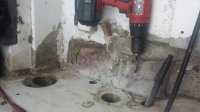
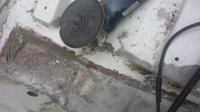
here are pics of the removal of the odd-looking FRP (again, seems to be like this from the factory in 2005):
3.JPG

4.JPG

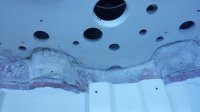
BONDING SLOPE: with the transom area cleaned up, i ground the area surrounding the repair an additional 1.50" from the hole, at a bevel. i used an angle grinder with a coarse sanding disc for this. we want at least a 10:1 ratio (12:1 is optimal) for the new glass to adhere to. the factory glass is generally 1/8" to 3/16" thick, so that is roughly 1.50" out from the hole. use 60-80grit sandpaper to ensure a good bonding surface. clean any dust, oil, and water off with acetone before wetting out your glass:
5.jpg

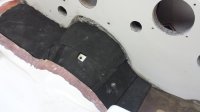
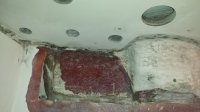
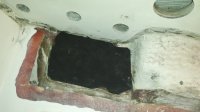
SHAPING: i thought about how i was going to support the new glass for a long time. i finally came up with filling the void with Darice (brand name) Foam Sheet. it's not the optimal solution to getting it to factory standards internally, but it's what i was comfortable with and it did the job really well:
7.jpg

8.jpg

9.jpg

10.jpg

11.jpg

12.jpg

13.jpg

14.jpg

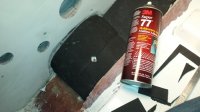
the bilge pump area was bridged with plexiglass. i precut it with a 3.25" holesaw and taped it so i could easily remove the hole after gel. i made sure to always keep the location of the screw visible that helped support the popsicle stick (which kept me from pulling the plug out) so i knew exactly where to place the 3" holesaw when the gelcoat was done. i used epoxy to secure the bridge (the plexi is still there, hidden under glass) and then added more foam to smooth out all the transitions:
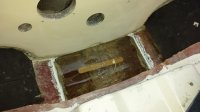
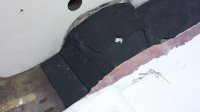
15.jpg

16.jpg

17.jpg

18.jpg

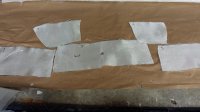
FIBERGLASS LAYERS: i made patterns out of waxed paper and transferred them to the raw fiberglass. always alternate strand mat and woven cloth and make sure the ends overlap if it is like a jigsaw puzzle. start with thinner mat (1.5oz) that is the entire size of the hole & slope area, then a slightly smaller area of cloth (6-8oz). i tried to make the smaller pieces 1/8" smaller around the edges. then a layer of thick mat (i occasionally used the 3oz stuff every few layers to speed up the process). alternate mat (1.5oz) with the cloth (6-8oz) as it builds up level with the underside of the gel. multiple thin layers of fiberglass are stronger compared to thicker layers that move the job along quicker. always try to finish with mat as the top layer, otherwise there's a slight risk that the cloth's weave may show through the gelcoat. cut all the layers out first and check that they fit as planned before starting to wet any of them out. even if a new batch of resin needs to be made before all the layers are done, there will be time to get the next layer on before the last layer cures - this will give it the strongest bond. if it cures, you will need to score the surface with 60-80grit again before adding more layers. there are calculators online (Fibreglast.com has a good one) to ballpark how many layers of raw fiberglass and amount of resin you will need for each patch. this varies on technique and i soon figure out which way to skew the sums for my methods (a little extra resin):
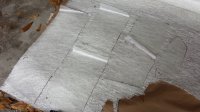
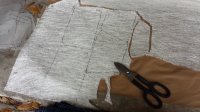
19.jpg

20.jpg

21.jpg

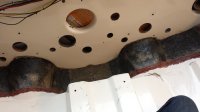
RESIN CHOICES: i considered the three common types of resin. the factory uses polyester because it is cheap. some recommend epoxy because it will make a very strong bond to anything, has a long shelf life, is fumeless, and will cure no matter the ambient temperature. conversely, it's very expensive and has less flex than the others. also, gelcoat doesn't always stick to epoxy resins (i avoid it for this reason - Marine Tex is an epoxy). i chose vinyl ester because it is a good compromise between the two 'esters. simply put, it is a stronger, more water-resistant version of polyester. like poly, it requires MEKP (ketone peroxide - the catalyst) to cure - always. anytime i mention a resin or gelcoat (gelcoats are poly based), there is always MEKP mixed in. the main difference with vinyl is that it has a fairly specific MEKP mix ratio (2%), whereas poly has a bit of range (1-1.5%) for different ambient temperatures and desired cure rates. overall, i was extremely happy with the vinyl. once i did some tests, i knew i did not need the mega-bond of the epoxy. i originally tried to use a finned roller to spread the resin. it only caused grief as it pushed around my perfectly laid glass. i found that pre-wetting the glass on a board wrapped in foil, placing the glass into position, and then stippling the glass with the tip of the bristles worked great to get it into corners, over edges, and remove bubbles quickly. a good idea is to tape off the gelcoat surrounding the repair area to minimize cleanup. any spilled, non-cured resin can be wiped-up easily with acetone. otherwise, use a razor blade to chip it off:
22.jpg

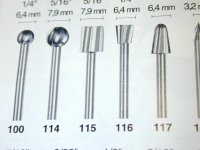
BASIC FILLER OPTIONS: there were gel cracks i ground out with Dremel bur #117, but were not wide enough for glass mat. to fill these, i made what the pros call "peanut butter" due to its consistency. it is also useful for fillets (pronounced "fill it") for making the inside of corners using a tongue depressor. it is resin mixed with fumed silica to reduce sag and sometimes loose fiberglass is added for tensile strength. there is chopped glass (loose strands) and milled fiber (looks like balled-up newspaper for hamsters). i used both, depending on the situation and my mood. the chopped glass produces a much stronger result - a few small pinches to 2 oz of resin is a good start. you'll find that if you add too much chopped glass, it will become "hairy" and not spread well - that's the trade off. to give it a more uniform consistency (prevent it from being runny), add a decent amount of fumed silica. be sure to mix the resin and MEKP thoroughly before ever adding anything to it or you may have a curing issue. if something doesn't cure in the proper amount of time (fillers increase working time), there's a 99.9% chance it never will - it will just have to be removed and refinished.
117.jpg
 
Last edited:

CrankyGypsy

Jetboaters Captain
Messages
352
Reaction score
296
Points
202
Location
Tampa, FL 33615
Boat Make
SeaDoo
Year
2008
Boat Model
Challenger
Boat Length
18
FAIRING: this step is just like automobile bodywork. i basically made some body filler with the resin, silica, and microballoons. this step is done as the last layer of glass starts to kick to increase the bond. the fumed silica is a thickening agent and the microballoons are tiny glass beads that make the resin easier to sand. again, add these agents after you have thoroughly mixed in the MEKP. the microballoons will absorb some of the catalyst heat, giving you a little more working time before it kicks (starts to congeal). i found that keeping it a consistency just shy of jello pudding allowed me to spread it easier. it will take a lot of microballoons to get there. if it's too thick/dry (like peanut butter), it will ball up behind the plastic spreader. i usually started with a thicker-consistency "rough coat" of filler to get the basic shape tuned-in, sanded this out, and then 1-3 more thinner-consistency coats to help it flow into smaller spots and fair all my surfaces:

23.jpg
24.jpg


MAINTAIN TEMPS: poly and vinyl produce better (read: more resilient) bonds if they are allowed to cure overnight at a temperature above 70*F. i did most of my repairs in February and although i am in Florida, it was in the upper-50s to low-60s those nights. the solution i came up with was to use a couple space heaters set up to keep the area around 75*F. i placed the heaters inside the bay, being careful not to have them blowing directly on repairs, covered the engine bay with a giant piece of cardboard, then the entire boat with the mooring cover. i also placed a shop lamp under the keel to allow radiant heat to keep the hull warmer while the engine bay cured:

32.jpg

PREP FOR GELCOAT: paint is at least 90% prep and it holds true to gelcoat as well. prep the area to be coated with 220grit for spraying, or 150grit for brushing. i used several styles of sanding blocks. the ones i liked the most were the Shopsmith velcro sanding blocks i found at Lowe's. they change out paper quickly and come in different sizes, which helped a lot. the replacement paper isn't cheap, but it is certainly convenient. the object is to smooth the surface of course, but also very slightly dish out the repair area to allow for the proper thickness of gelcoat. the desired thickness of the gelcoat is between 0.010 and 0.020 inches. too thin and the gelcoat may crack and/or the repair will be visible and more susceptible to UV damage; too thick and the gelcoat can crack.

GELCOAT & ADDITIVE BASICS: the most daunting step of the process - it has to look good since it is what everyone sees, but the working time feels shorter and clean up is a real pain. gelcoat's job is to protect the fiberglass from UV rays and to seal water out. there are so many options and variations for applying this stuff, so it took me a while to nail down specifics for my personal needs. for the engine bay, i chose to spray it because it was a lot of area with many angles and surfaces. since it was not going to be subjected to UV rays, i was willing to give an additive a try. additives like Duratec and Patch Aid reduce orange peel (which in-turn reduces sanding) and eliminate the need for a surfacing agent (like wax or PVA). the downside is that they can tint yellow under excessive UV rays.

i get my supplies locally from FGCI. for the engine bay, i used their Misty White gelcoat. it looked close but didn't have to match since i was spraying the entire bay. for the hull, i went with FGCI FGCS White - i have no idea what FGCS stands for (code for Bright White?), but it looks near-perfect under the boat (not sure if it is as good a match topside in the sun). Misty White is part of FGCI's brushable exterior line, but i sprayed it without issue. FGCI states their brushables just require a gun with 2.0mm tip/nozzle and should not be used below 65*F. conversely, their FGCS White is part of their exterior line for spraying but i brushed it with great results. exterior gelcoat remains tacky for increased bond to the next coat, while interior comes pre-mixed with a surfacing agent to eliminate tackiness.

SPRAYING GELCOAT: i used two guns with different tips hooked to a Husky 30gal compressor. i sprayed 3-4 coats of pure gelcoat through a 2.3mm tip on a Vaper HVLP gun (Titan #19023 - though one Northern Tool reviewer claims this is a non-HVLP gun) to get good coverage on the patch areas. followed by 2 coats of a 50% gelcoat and 50% Duratec mix through a 1.4mm tip on a Husky HVLP gun (#H4840GHVSG - Home Depot has a kit that i bought which comes with this HVLP and a standard/non-HVLP gun* # HDK00600SG) on the entire engine bay to blend everything together. pure gelcoat received 1.5% of MEKP since it is polyester based. Duratec recommends 2% MEKP for temps under 82*F, and 1.5% for temps above. working time in ~77*F allowed me to spray 2oz of pure gelcoat or 6-7oz of the 50% mix of Duratec - don't doddle and have a bucket of acetone ready to drop the gun in to start cleaning, otherwise it will gum up badly. doing batches larger than 2oz of pure gelcoat will cause the mix to overheat/kick faster than you can spray it. the 50/50 coats were sprayed over the entire engine bay so that i had a nice uniform color/finish with no feather edges. a benefit of using the Duratec (or Patch Aid) is that there is no need for additional additives like wax or PVA because it is also its own surfacing agent, giving all the coats a full cure. spraying pure gelcoat too thin also runs the risk of not fully curing, but even a thin blending coat of a Duratec Hi-Gloss mix will (i am unsure if Patch Aid will do this).

*HVLP vs Standard/Conventional guns: from what i've read, High Volume/Low Pressure guns are generally more efficient but usually require more CFM's from a compressor. an HVLP produces less overspray and puts more materiel onto the desired surface. Standard/Conventional can use less CFM, but spray at a higher PSI - this produces more overspray. i used a Husky 30gal 175PSI compressor that is rated 5.1 SCFM at 90PSI and 6.8 SCFM at 40PSI**. the Husky gun only requires 4 CFM at 40PSI. the Vaper specs state it needs 7-9 CFM, but i had no issues with it on my compressor for this job.
Gravity Feed: any gun where the paint is supplied from above the tool is a Gravity Feed, as apposed to a Suction/Pressure Feed that can be supplied from below. seems the simpler Gravity Feed is the preferred option, though the benefit of a Suction/Pressure Feed is that it can work at any angle. i did not encounter any real issues spraying horizontal surfaces with my gravity fed guns - i was able to keep the gelcoat going into the gun.

**CFM vs SCFM or Cubic Feet per Minute vs Standard Cubic Feet per Minute: CFM is a calculation of the volume air and how fast it is delivered. SCFM is a standardized CFM rating at 68*F, sea level, and 0% humidity. if you go higher in temp, altitude, or humidity, the compressor will produce less CFM. so doing any work outdoors is generally going to require a higher CFM compressor to get the same result at the tool. it doesn't mean a high-CFM tool won't work because i used the Vaper gun with no problems.


i didn't expect a professional smooth finish since i had never used a spray gun before, especially with the added difficulty of gelcoat. the end result was similar in look and feel to finely textured ABS plastic - like a factory-intended anti-skid. it came out better than i had hoped for, especially for my first try. though both additives help in flowing the gelcoat out smoother, one reason i chose Duratec Hi-Gloss over Patch Aid was because i wanted a glossy finish that would not need sanding and/or polishing - it worked out perfectly. had i planned to sand, i would have chosen Patch Aid - from what i read, it is preferred by some pros for it's predictability and longevity (whatever that actually means). again, a downside to using these additives is that they may slightly yellow the finish over time, especially in the sun. the higher the percentage of any thinning additive (usually styrene), the higher the chances of tinting happening. the pros will still use these additives and traditional thinners (like acetone) because the benefits of smooth gelcoat flow seem to outweigh the risks in certain circumstances. unlike in the past, acetone and other traditional thinners run the risk of slightly tinting the finish pink with today's gelcoat formulas (this may vary between gelcoat manufacturers, though). to be safe, always try to avoid thinning gelcoat with acetone (or variants) whenever possible. if it must be thinned to get it to pass through the gun, 5-10% thinner is preferred, and thinning by 10-15% would be the max. yes, this defies the Duratec and Patch Aid usage, but in my newbie ignorance, i haven't figured out the difference ...unless it's just yellow versus pink?

when i sprayed, i shaded the work area with a blue tarp. so i converted these pictures to grayscale to remove the blue tinting effect. i learned the hard way to cover anything nearby that isn't supposed to get sprayed because this stuff will find it's way onto every surrounding surface. luckily, it cleaned off easily with acetone. note the acoustic foam within the engine bay in the last pic of this set:

33.jpg

34.jpg

35.jpg

36.jpg

37.jpg

38.jpg

39.jpg

BRUSHING GELCOAT: i also experimented with brushing, but a few years later i found, that in lieu of spraying, rolling gelcoat was very practical and produced excellent results. in my opinion, either way (spray or brush) is a trade off. i learned that with a decent quality brush and a technique of feathering the brush outward with very quick strokes, i could get good results. the benefit of brushing was eliminating the overspray that would be impossible to contain and the tedious spray gun cleaning. the downside is that it requires a build-up, sanding, then additional brushing to get a level surface due to the "inconsistent nature" of brushing, followed by hours of sanding. because of repeating these steps to get a near-perfect surface, it took much longer to do.

again, i was still only able to brush 2oz of pure gelcoat at a time before it would start to kick in 78-80*F weather. i would quickly feather the gel outward - this would build up material in the deeper parts of the repair area and yet taper the edges. i found slower strokes produced more bristle grooves, so i kept them quick. to help eliminate the resulting brush texture, i would brush consecutive coats in a different direction: up and down, then left and right, up and down, etc. apply additional coats one after the other so they can bond to each other. if the gelcoat is left overnight, it would need prepped with sandpaper again to ensure better adhesion (see below about surfacing agents). since there is going to be loads of sanding, the texture at this point is not at all important. there will be a lot of waste using the brush - probably comparable to the waste when cleaning a gun. but instead of cleaning gummed-up tools, the waste will come in the form of sanding dust. the brush can be reused indefinitely if the bristles are placed in a jar of acetone, cleaned, and then dried. give the gelcoat 24-48 hours to dry before sanding to allow for shrinkage.

there is actually no need for surfacing agents in this method. again, this method will require lots of sanding, so don't expect a smooth surface. that's why i chose not use a surfacing agent and instead simply wiped the thin, uncured skin off with acetone. here's why: gelcoat will never fully cure as long as it is exposed to air. no amount of MEKP or heat will give it a proper cure unless it is sealed from the atmosphere. this is what surfacing agents like wax and PVA do - they form a barrier so the outer layer of gelcoat can cure. i didn't like the PVA because there are funky time-frame rules for application and it can tint the gelcoat whatever color the PVA happens to be (i found this out on my own). the wax is just another variable that i deemed unnecessary for this technique as i found comfort in knowing that my gelcoat would be applied with no "contaminants" at 100%. the surfacing wax rises to the surface, so it still has to be wiped off with acetone ...to me, it was pointless since i was wiping it anyways. if the wax or skin is not removed, it will quickly gum-up the sandpaper used to level it out.

FAIRING: when sanding gelcoat, feather it out by starting with the block/board within the repair area and sanding outward to prevent chipping the edges up. it's best to buy (expensive) or make a fairing board for this. i used a piece of "finishing board" made of pine used for woodworking (aka common board for furniture projects and accents). the pieces i used were 2.50 x 24 x 0.25 inches (which i added two handles to) and 3.50 x 24 x 0.25 inches. my neighbor also gave me a simple fairing board with size-matched sandpaper that had a layer of dense foam on it to allow some give under the paper. i used a thin coating of light-duty spray adhesive to adhere standard sandpaper to my makeshift boards:

43.jpg

once the gelcoat's skin has been removed, start with 220grit, then 320, 400, 600, 800, 1200, and finish with 1500. it is not necessary to use all the grits, but this gives a good idea of what to expect if a great finish is desired - lots of grueling sanding. don't apply a lot of pressure with the homemade fairing boards - let the paper do the work. since the brush can lay down some really thick peaks, an Ingersoll-Rand 4151 6" Orbital Sander (or similar) can be used to knock these spots down before continuing with the fairing boards. with an orbital or DA, try 220grit - if that's not cutting, try 180grit or a few quick swipes with some 80grit. be extremely careful with this type of tool because it can get away from you very quickly and put you back in the gelcoat phase. using the easy-to-control fairing board and going slow and steady will be tedious, but the control it allows pays off in the end. for large, flat surfaces/planes a rigid 4' aluminum ruler on hand as a straight edge can help find the high spots. spraying or rolling gelcoat will reduce the amount of "knock-down" and save a lot of time.

doing tighter areas requires something smaller than the fairing board. for those circumstances, i also used the 3M Stikit Plastic Sanding Blocks (they are red) because they have a felt pad and quickly feed out new paper. once i got into the finer grits, i would switch to a 3M Stikit Soft Hand Pad (3M 05530) because it provides a lighter-touch cut. those are also great for corners or irregular surfaces at coarser grits.

COMPOUND & POLISH: mount a 6" flexible backing plate to a Makita 9227C Sander/Polisher set at 1300-1500RPMs with 7.5" Lake Country Foamed Wool pads for both compounding and polishing. i use that set-up to apply 3M Marine Rubbing Compound that is buffed off by hand with a flannel rag, followed by 3M Finesse-It II Glaze that is buffed off with a microfiber towel. i then seal this by hand-applying a light coat of Starbrite Marine Polish with PTEF with a flannel towel and buffing it off with a clean flannel before it can dry and start to streak. finish everything off with Collinite's Fleetwax.


TERMINOLOGY AND ADDITIONAL NOTES:
patch: a fiberglass and gelcoat repair.
wet out: add resin to fiberglass.
kick: congeal; begin the curing process.
fumed silica: a filler that helps reduce sag of resin (aka Cab-O-Sil).
microballoons: tiny glass-beads filler that make resin sandable.
fair (verb): to make it smooth, be it curved or straight by sanding (usually with a long board) and/or adding filler.
pure gelcoat (with MEKP) provides maximum UV resistance.
needless syringes (3-5cc) are great for measuring MEKP.
1cc = 1ml.
MEKP (the catalyst used to harden resins) is not the same as MEK (a solvent that can be used to thin gelcoat for spraying).
stir resin and MEKP for 2 mins to prevent curing issues. then add fillers.
thinning gelcoat helps blend gelcoat repairs.
thinning gelcoat helps blend new and old gelcoat.
thinning gelcoat helps when a color cannot be perfectly matched.
thinning gelcoat too much risks undesirable tinting.
thinning esters (poly, vinyl, or gelcoat) with a solvent (never use more than 10%) risks proper curing and may weaken adhesion.
thin esters with up to 10% acetone to use as a wash coat that will penetrate wood better.
for thinning, place a measured amount of the ester in the sun prior to catalyzing (however, this can decrease working time).
Duratec may be used below the waterline if the boat is not stored in a wet slip.
Duratec and Patch Aid may yellow over time, especially from sun exposure.
Duratec extends the work time of gelcoat.
Patch Aid is also known as Patch Booster.
when calculating MEKP for a Duratec or Patch Aid mix, use the combined volume of resin and additive.
shake gelcoats, Duratec, and Patch Aid before using (shake everything).
if a gelcoat is incompatible with Duratec or Patch Aid, it will fisheye out of a gun.
practice with a spray gun by spraying gelcoat without the MEKP onto cardboard boxes.
always use a good respirator, especially when mixing fumed silica (3M 6200 w/ organic vapor filters).
prepare to use a lot of acetone with thick rubber gloves.
Duratec and Patch Aid have a shelf life of one month.
polyester, vinyl ester, and MEKP have a shelf life of about three months.
darker gelcoats age worse (UV damage) than lighter colors, making patches stick out.
make gelcoat putty by adding fumed silica to gelcoat and letting it sit overnight in a sealed jar to get the lumps out.
seal repair layers containing fumed silica because the silica makes it porous.
1 gallon of ester resin weighs about 8-9 pounds.
these websites have a lot of helpful resources: Fiberglassics (my fave; check under the Research tab), West Systems, Spectrum, Fibre Glast, and FGCI.
Materials Calculator: http://www.fibreglast.com/fibreglast_materials_calculator
 
Last edited:

itsdgm

Jetboaters Admiral
Messages
3,637
Reaction score
3,089
Points
417
Location
Rancho Santa Margarita, California
Boat Make
Yamaha
Year
2007
Boat Model
AR
Boat Length
21
Wow. Great write up @CrankyGypsy. Also, thanks for the how to remove engine thread as well. I'll be taking some info from that one. ;)
 

Scottintexas

Jetboaters Admiral
Staff member
Messages
5,792
Reaction score
6,355
Points
482
Location
Corinth, TX (DFW)
Boat Make
Yamaha
Year
2007
Boat Model
AR
Boat Length
23
great post, added to the FAQ,
 

Bruce

Jetboaters Fleet Admiral 1*
Staff member
Administrator
Messages
13,326
Reaction score
13,421
Points
857
Location
Royal, AR
Boat Make
Yamaha
Year
2007
Boat Model
SX
Boat Length
23
Wow, what a post!
 

4x15mph

Jetboaters Admiral
Messages
1,845
Reaction score
1,075
Points
257
Location
Downingtown, PA
Boat Make
Yamaha
Year
2018
Boat Model
AR
Boat Length
21
Have to say this could be the greatest write-up as far as detail, pics, etc. The repair in the engine bay looks better than new and came out awesome.
 

buckbuck

Jetboaters Admiral
Messages
3,804
Reaction score
5,228
Points
407
Location
Texas
Boat Make
Yamaha
Year
2008
Boat Model
X
Boat Length
21
I can't imagine how long it took to write that up. Great job. Any estimate on man hours doing the repair?
 

Big Shasta

Jetboaters Captain
Messages
1,884
Reaction score
1,529
Points
227
Location
Panama City Beach, FL
Boat Make
Boatless
Year
NA
Boat Model
Other
Boat Length
NA
WOW, Awesome Job!
 

Julian

Jetboaters Fleet Admiral 2*
Staff member
Administrator
Messages
18,359
Reaction score
20,439
Points
1,082
Location
Raleigh, NC 27614
Boat Make
Yamaha
Year
2016
Boat Model
242X E-Series
Boat Length
24

octavio3311

Jetboaters Admiral
Messages
2,027
Reaction score
3,315
Points
342
Location
Brookfield, Ct
Boat Make
Yamaha
Year
2013
Boat Model
X
Boat Length
21
Man - that's an awesome job and great write up. Thanks for sharing.
 

bronze_10

Jetboaters Admiral
Messages
4,672
Reaction score
4,643
Points
387
Location
Raleigh / Wake Forest Area..
Boat Make
Yamaha
Year
2008
Boat Model
SX
Boat Length
23
Holy cow I wish I were that manly! If that happened to me I would cry in the corner and then start digging out check book.... great job !!!
 

swatski

Jetboaters Fleet Admiral 1*
Messages
12,806
Reaction score
18,566
Points
822
Location
North Caldwell, NJ
Boat Make
Yamaha
Year
2016
Boat Model
AR
Boat Length
24
@CrankyGypsy Just Freaking AWESOME.

I was just reading your old post about engine realignment and coupler clearances - thank you very much for sharing, super informative.

Your documenting / reporting skills are second to none, too!
 

CrankyGypsy

Jetboaters Captain
Messages
352
Reaction score
296
Points
202
Location
Tampa, FL 33615
Boat Make
SeaDoo
Year
2008
Boat Model
Challenger
Boat Length
18
thanks guys!

@buckbuck haha, if i don't take the time to write this stuff down, i'll forget it - my memory is terrible. it took a few hours to gather all of my notes into an order that made sense.

job hours? sorry, no clue. i worked on it a few hours a day on my days off from Sept 7, 2014 until a very successful water test May 15, 2015. this included doing a lot of other things, like a drivetrain overhaul and alignment.

@swatski thanks, you should check out my Rubicon build thread over at www.jeepforum.com for some really crazy write-ups, especially the "geometry, thrust angle, and alignment" post. like i said above, if i don't write this stuff down in detail, i'll not know how to do it again if i need to.
 
Last edited:

Speedling

Jetboaters Admiral
Messages
5,099
Reaction score
4,288
Points
432
Location
Cedar Lake, IN
Boat Make
Yamaha
Year
2008
Boat Model
SS
Boat Length
21
AMAZING!
How did I miss this before?
One tip I have used for spreading resin onto fiberglass is to pour it onto the high spot and use a scraper of some sort to smooth it into the fiberglass down to a low spot.
I need to re read a lot of it though because you just made this thing beautiful!
 
Top