Seadeals
Jetboaters Admiral
- Messages
- 1,279
- Reaction score
- 1,501
- Points
- 287
- Location
- Greenville, South Carolina
- Boat Make
- Yamaha
- Year
- 2006
- Boat Model
- SX
- Boat Length
- 21
My SX210 is now the big 10 and I enjoy doing inspections and routine maintenance to get things back in top shape. My starboard steering cable has been taking on water. Steering is still smooth and easy; but to prevent an unexpected failure on the water, I am replacing both steering cables. With the right tooling, there may be a way to do so without pulling the pumps; but as I like pulling, inspecting and cleaning the pumps in the off season anyway, it will make access easier and I will show the breakdown of the pump assemblies including a check of the grease for the impeller shaft bearing inside the cone. While I have not owned this boat her whole life, I believe no one has ever checked the cones.
I am pulling the entire pump assembly. Disconnect the steering and reverse gate linkages at the nozzle. Start pump removal with the small bolt near the intake passage.
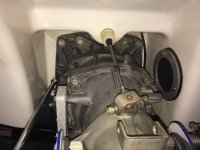
Next remove the four bolts on each corner of the pump housing.
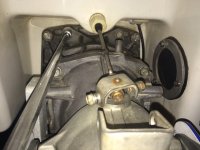
The housings have doweling pins. I use a soft rubber mallet to tap alternating sides of the pump to walk it out until the annular recess clears. You will also have friction from the impeller shaft spline as it backs out. Here it is just after it separates. Pull it out in-line until the impeller shaft clears.
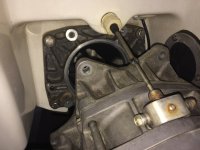
Here is the mounting plate that remains with the reverse gate and steering cables. I put the bolts back in to keep track and in the same hole (however the main four are all the same).
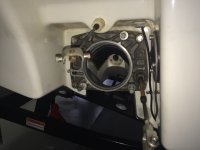
Here is a photo of the intake and the impeller shaft tube. Note the black paint and some visible pitting starting to appear from underlying corrosion. I cleaned off most of the corrosion, treated and painted this three years ago.
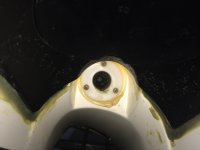
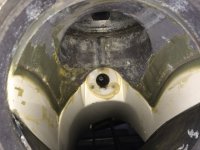
Here is the starboard side, which I have yet to address other than a good cleaning. The Port side originally looked like this. The clean-out plug is removed, so you can see where it locks in. It was no surprise the prior owner has issues with stuck plugs. Installing the plug repair kit when I first bought the boat ended that trouble; but this could not have helped, especially when it was dirty.
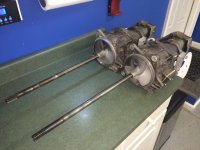
Here are both pumps out and on the counter.
The starboard impeller has some rust spots; but is free of any damage.
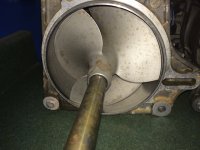
I had Impros refurb the port impeller when I cleaned up the intake. It is still looking very good after three years of decent use. Everything on the port pump is cleaner since I have given it attention before and it also came off and apart very easily compared to the starboard side. The small brown object on the shaft was actually a piece of leaf that got stuck in the space between the impeller shaft and impeller. It pulled right out.
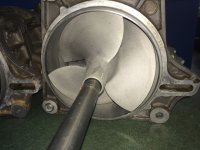
Nozzles are the same; but as the impellers are pitched differently, it is important to keep components together/matched, so label to help keep track.
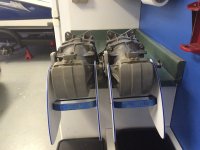
Separate the steering nozzles by removing one bolt on the top and one on the bottom. Separate the fixed nozzle by removing the four long bolts which attach all three sections. There are pry tabs built into the housing on each side. You need to slowly work them apart (back and forth side to side) until the sections clear the pins and mating surfaces. Most of the pins are usually snug in one side or the other; but one of mine was loose, so be sure to note them and keep track of them.
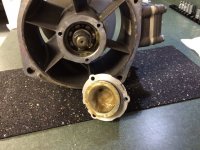
Once the nozzle is off, you can access the cone. I am pretty sure this is original grease from 2006; not as bad as I expected. Note the coverage on the ball bearings. I think the lighter color in the cone may be grease with water contamination. I think this would have lasted a lot longer though I always worried what they were like every time I heard the engines sound a little funny (mostly just a piece of debris in the pump).
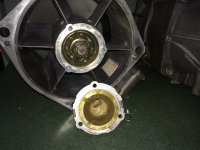
Here is the starboard side. I am sure this would have gone bad first. there is a lot less grease in the actual bearing. Note most is all the lighter color and the congealed grease around the cone flange where it was at the bearing. Now I get to look up the cone lube thread (no dirty thoughts on that one, please).
Back to the boat and steering cables. I learned what a pass-through socket was researching the cable replacement. I bought a set that happened to go all the way up to 7/8 at Lowes for $35. I like them a lot, so this was a great excuse for more tools.
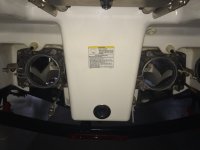
Before I started removing the cable nut, I measured the threads to the linkage end as a reference for when the new cables go in.
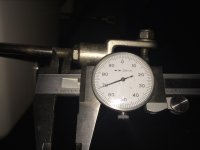
Then I removed the linkage end so the pass-through socket could pass down the cable end. Here is the 3/8 drive 7/8" Kobalt pass-through socket on the steering cable nut. I am glad the pump was out of the way.
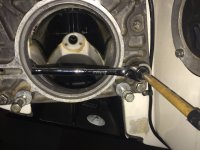
Here is the nut and washer removed. This is siliconed when it goes in so there is friction on the hardware and the cable through the hole in the hull until you break the silicone.
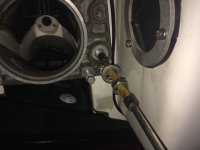
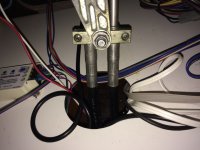
Here is the other end of the steering cables where they come into the helm (looking up).
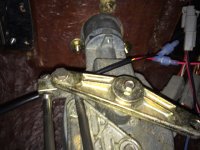
Here is where they actually attach to the steering unit (now looking down).
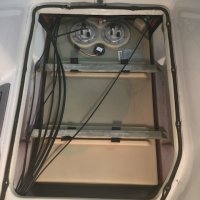
Once disconnected, you may want access to the right bow compartment area and beneath the floor (fuel tank access). The first time I removed the floor was a royal pain. I cleaned up bolts along with the gunk in the holes, and ordered some new bolts where needed (I had to cut the head off of one to get it out). I pull the floor at the end of every season to top off my tank as much as possible without getting gas in the filler tube. Some have posted on fuel expansion leaking gas out and ruining their decals. Note the bubble of fuel visible on the tank top. I also like to inspect for any leaks, check clamps and look for any other issues.
This is as far as I have gotten, so I will continue the post once cables arrive.
I am pulling the entire pump assembly. Disconnect the steering and reverse gate linkages at the nozzle. Start pump removal with the small bolt near the intake passage.

Next remove the four bolts on each corner of the pump housing.

The housings have doweling pins. I use a soft rubber mallet to tap alternating sides of the pump to walk it out until the annular recess clears. You will also have friction from the impeller shaft spline as it backs out. Here it is just after it separates. Pull it out in-line until the impeller shaft clears.

Here is the mounting plate that remains with the reverse gate and steering cables. I put the bolts back in to keep track and in the same hole (however the main four are all the same).

Here is a photo of the intake and the impeller shaft tube. Note the black paint and some visible pitting starting to appear from underlying corrosion. I cleaned off most of the corrosion, treated and painted this three years ago.

Here is the starboard side, which I have yet to address other than a good cleaning. The Port side originally looked like this. The clean-out plug is removed, so you can see where it locks in. It was no surprise the prior owner has issues with stuck plugs. Installing the plug repair kit when I first bought the boat ended that trouble; but this could not have helped, especially when it was dirty.

Here are both pumps out and on the counter.

The starboard impeller has some rust spots; but is free of any damage.

I had Impros refurb the port impeller when I cleaned up the intake. It is still looking very good after three years of decent use. Everything on the port pump is cleaner since I have given it attention before and it also came off and apart very easily compared to the starboard side. The small brown object on the shaft was actually a piece of leaf that got stuck in the space between the impeller shaft and impeller. It pulled right out.

Nozzles are the same; but as the impellers are pitched differently, it is important to keep components together/matched, so label to help keep track.

Separate the steering nozzles by removing one bolt on the top and one on the bottom. Separate the fixed nozzle by removing the four long bolts which attach all three sections. There are pry tabs built into the housing on each side. You need to slowly work them apart (back and forth side to side) until the sections clear the pins and mating surfaces. Most of the pins are usually snug in one side or the other; but one of mine was loose, so be sure to note them and keep track of them.
Once the nozzle is off, you can access the cone. I am pretty sure this is original grease from 2006; not as bad as I expected. Note the coverage on the ball bearings. I think the lighter color in the cone may be grease with water contamination. I think this would have lasted a lot longer though I always worried what they were like every time I heard the engines sound a little funny (mostly just a piece of debris in the pump).

Here is the starboard side. I am sure this would have gone bad first. there is a lot less grease in the actual bearing. Note most is all the lighter color and the congealed grease around the cone flange where it was at the bearing. Now I get to look up the cone lube thread (no dirty thoughts on that one, please).

Back to the boat and steering cables. I learned what a pass-through socket was researching the cable replacement. I bought a set that happened to go all the way up to 7/8 at Lowes for $35. I like them a lot, so this was a great excuse for more tools.

Before I started removing the cable nut, I measured the threads to the linkage end as a reference for when the new cables go in.

Then I removed the linkage end so the pass-through socket could pass down the cable end. Here is the 3/8 drive 7/8" Kobalt pass-through socket on the steering cable nut. I am glad the pump was out of the way.

Here is the nut and washer removed. This is siliconed when it goes in so there is friction on the hardware and the cable through the hole in the hull until you break the silicone.

Here is the other end of the steering cables where they come into the helm (looking up).

Here is where they actually attach to the steering unit (now looking down).

Once disconnected, you may want access to the right bow compartment area and beneath the floor (fuel tank access). The first time I removed the floor was a royal pain. I cleaned up bolts along with the gunk in the holes, and ordered some new bolts where needed (I had to cut the head off of one to get it out). I pull the floor at the end of every season to top off my tank as much as possible without getting gas in the filler tube. Some have posted on fuel expansion leaking gas out and ruining their decals. Note the bubble of fuel visible on the tank top. I also like to inspect for any leaks, check clamps and look for any other issues.

This is as far as I have gotten, so I will continue the post once cables arrive.
Last edited:


