Marvin willis
Jetboaters Admiral
- Messages
- 1,507
- Reaction score
- 921
- Points
- 267
- Location
- Morehead city nc
- Boat Make
- Yamaha
- Year
- 2018
- Boat Model
- AR
- Boat Length
- 24

We are delighted you have found your way to the best Jet Boaters Forum on the internet! Please consider Signing Up so that you can enjoy all the features and offers on the forum. We have members with boats from all the major manufacturers including Yamaha, Seadoo, Scarab and Chaparral. We don't email you SPAM, and the site is totally non-commercial. So what's to lose? IT IS FREE!
Membership allows you to ask questions (no matter how mundane), meet up with other jet boaters, see full images (not just thumbnails), browse the member map and qualifies you for members only discounts offered by vendors who run specials for our members only! (It also gets rid of this banner!)
looks good from my house! I can kinda see the faded spot from the old unit, is that what you're referring to? Would it be worth it to silicone around that with a tool to get a nice consistent bead? Might cover some of the discoloration, and those tools are super cheap. For small stuff likek that, I use some tool that has a ball on th end, and the excess is just peeled off afterwards, but you're left with a perfect consistent bead that looks really nice. I'll try to track down alink later.Before and after. Not perfect but better.
Yep. Plenty of room. It is annoying leaning over and working on my knees. The hardest part was finding all the hidden bolts for the oil pump, then scraping old gasket off. I was able to use my 1/4” driver to remove the flywheel bolt (it IS reverse thread). My 1/2” impact was too big. Surprisingly the small driver had enough “uumph” to break it free
I put on labels over the buttons.looks good from my house! I can kinda see the faded spot from the old unit, is that what you're referring to? Would it be worth it to silicone around that with a tool to get a nice consistent bead? Might cover some of the discoloration, and those tools are super cheap. For small stuff likek that, I use some tool that has a ball on th end, and the excess is just peeled off afterwards, but you're left with a perfect consistent bead that looks really nice. I'll try to track down alink later.
Ask and you shall receive ! Put your hands on the radio say Hallelujah Brother !For future use, @FSH 210 Sport made a platform to help with working over the engines. He may have a link to it in his sginature, but if not, this will tage him and he'll definitely be able to find it for you. Definitely a useful thing to build

That’s freakin genius! Definitely building one of my own!Ask and you shall receive ! Put your hands on the radio say Hallelujah Brother !
I have monkey arms but they’re not long enough to reach all the way to the back of the engine bay! There’s no where to support yourself when you boom out to get to the oil filters or intermediate bearings.
I bought a 2X8 and some 3&1/2” deck screws and threw this together today. This gives you some place to put your hands and a place to lay your body when you’re reaching into the engine bay, and your not putting weight onto the coil packs and injectors…. @drewkaree @WiskyDan @Ericd @Can0n11 @Dixemon
Dimensions;
32&1/2” cross board
7&1/2” drops
2&1/2” top...
- FSH 210 Sport
- Replies: 16
- Forum: General Discussion
I put on labels over the buttons.
I put on labels over the buttons.

Looking great where you get this door? I have 2018 ar 195 (just picked up ) my first boat everCut a big hole in my boat...
View attachment 207868
It worked out OK, but man was there a lot of fiberglass dust to clean out.
View attachment 207869
") Looking to do this door upgrade THX in advance
Looking to do this door upgrade THX in advanceAny size you want....Looking great where you get this door? I have 2018 ar 195 (just picked up ) my first boat ever
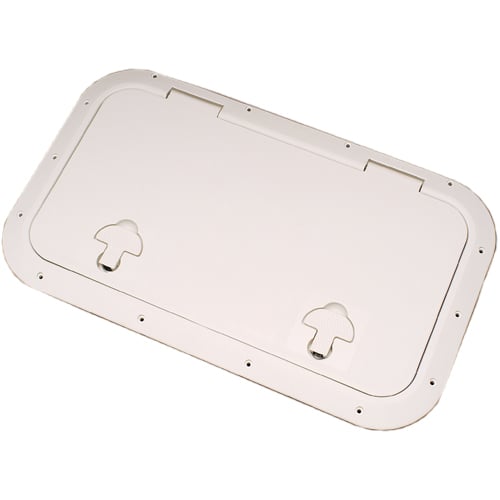
 www.westmarine.com


Cut a big hole in my boat...
View attachment 207868
It worked out OK, but man was there a lot of fiberglass dust to clean out.
View attachment 207869


Clean!!!After installing a LiFePO4 house battery a year ago I finally got around to adding a proper battery box as the Group 31 batter did not fit in the bettery well so It was one end inside and the other end out sitting on an angle. I also replaced my generic Amazon shunt with a Victron SmartShunt with a DIY ground Bus Bar.
For the battery box I used (2) 1" HDPE screed together to give me 2" block and mounted to the bottom of the battery box. Used 2 AWG cable to run from the battery to the shunt and the buss bar is 1/4" x 3/4" copper bar.
Before Photos
View attachment 231045
View attachment 231046View attachment 231047
After Photos
View attachment 231048View attachment 231049View attachment 231050


